
Before getting into your first JamKazam session with other musicians, it's a good idea to create a private session just for yourself, and use this private session to get your audio input levels set properly and make sure all of your gear is configured and working properly.
To start a private session, follow the instructions in this help article on creating sessions.
When you have successfully created the session, you will see a screen that looks like the one below. Your audio input track(s) are displayed on the left side of the screen, under the text header "Audio Inputs". In the screenshot below, the JamKazam user has set up one audio tracks for an electric guitar. Note that there is a second track displayed that looks like a duplicate of the Audio Input track, but this one is organized under the header Session Mix. Ignore that second track for now, and we will explain how to adjust your session mix in another help topic.
To check the audio input level on a track, start playing or singing to create audio on a track, and watch the VU meter on the track. The VU meter displays colored meter lights that show the current audio input level (your input level is similar to volume) for this track (pictured below).
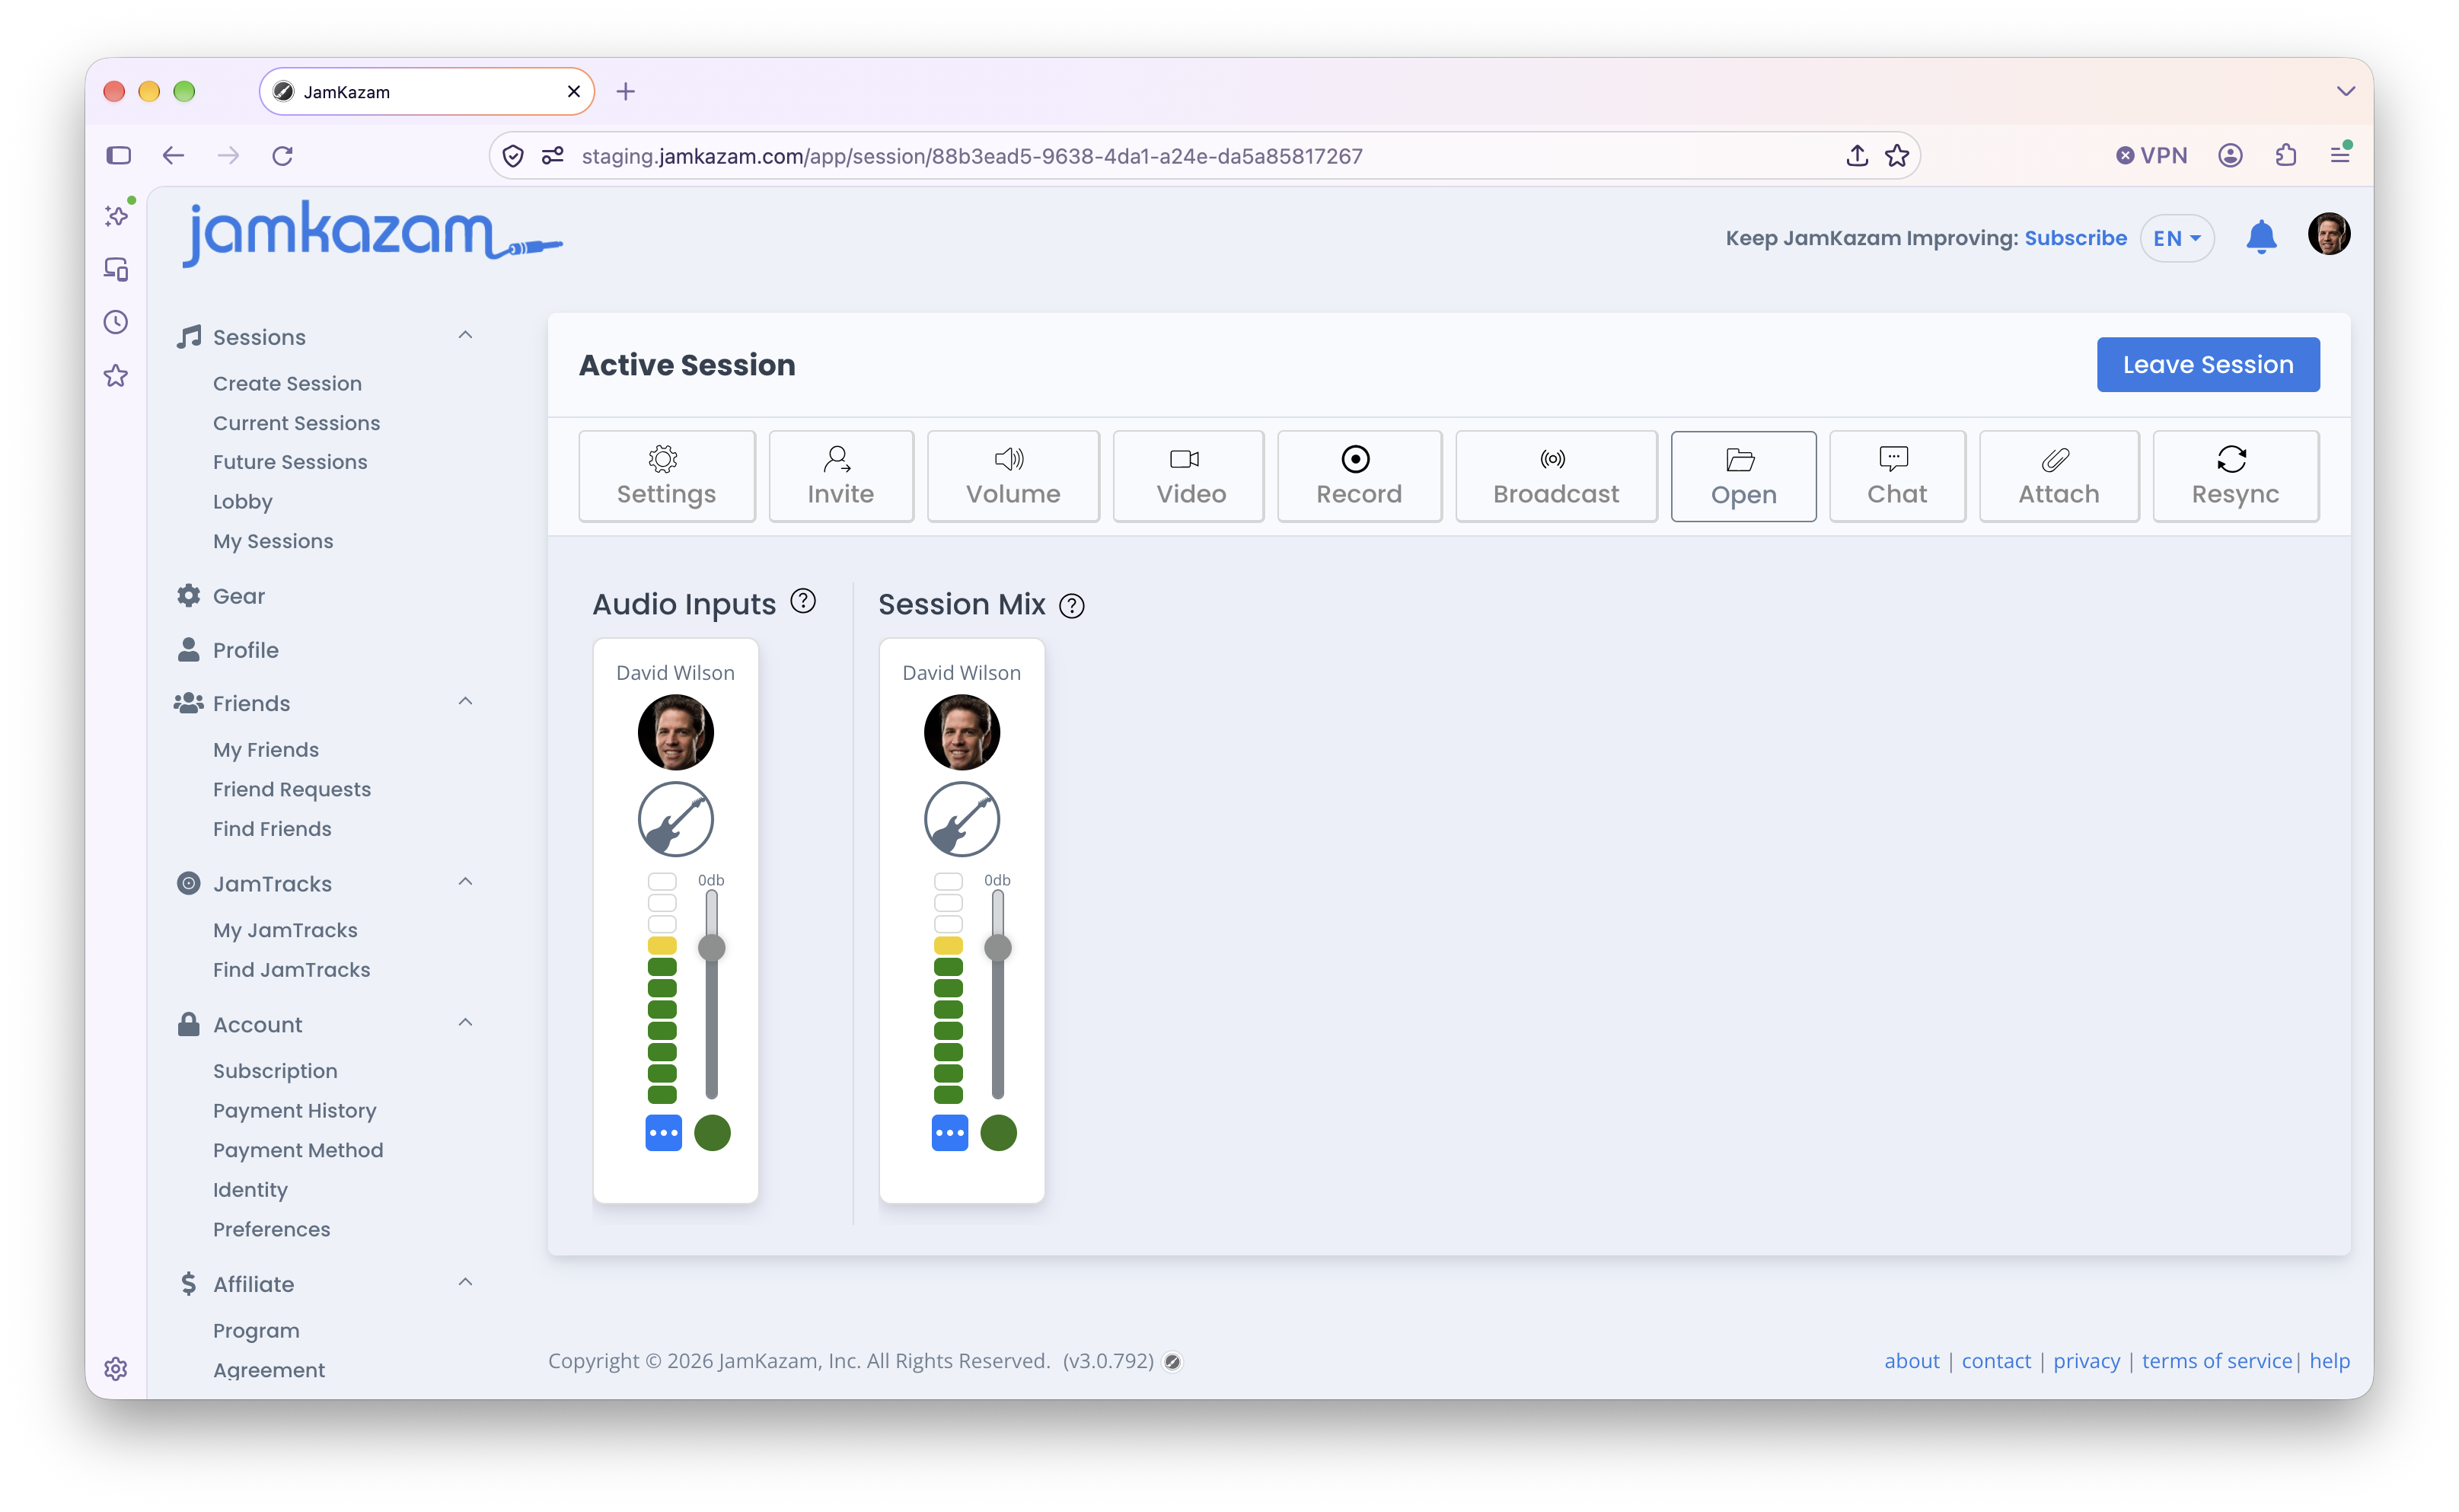
For each of your audio input tracks (you may have more than one set up), you should look at the VU meter, and then play your instrument or sing/speak into your vocal microphone at the volume you expect to be playing/singing in sessions. While doing this, watch to see where the meters light up. You want to get the input signal from your instrument or voice up to the top of the green and maybe one notch into the yellow, but not into the red – to avoid possible distortion or clipping on your audio input signal. The example pictured above is a good target, with the input registering mostly in the green, but sometimes peaking up just into the yellow.
If your meter lights are not getting to the top of the green, your audio input signal isn't strong enough. This can cause various issues, so you should turn up your input level for that track. To do this, you can turn the physical knob labeled "Gain" on your audio interface (see example below with an arrow pointing at each of the gain knobs for each audio input port on the interface).

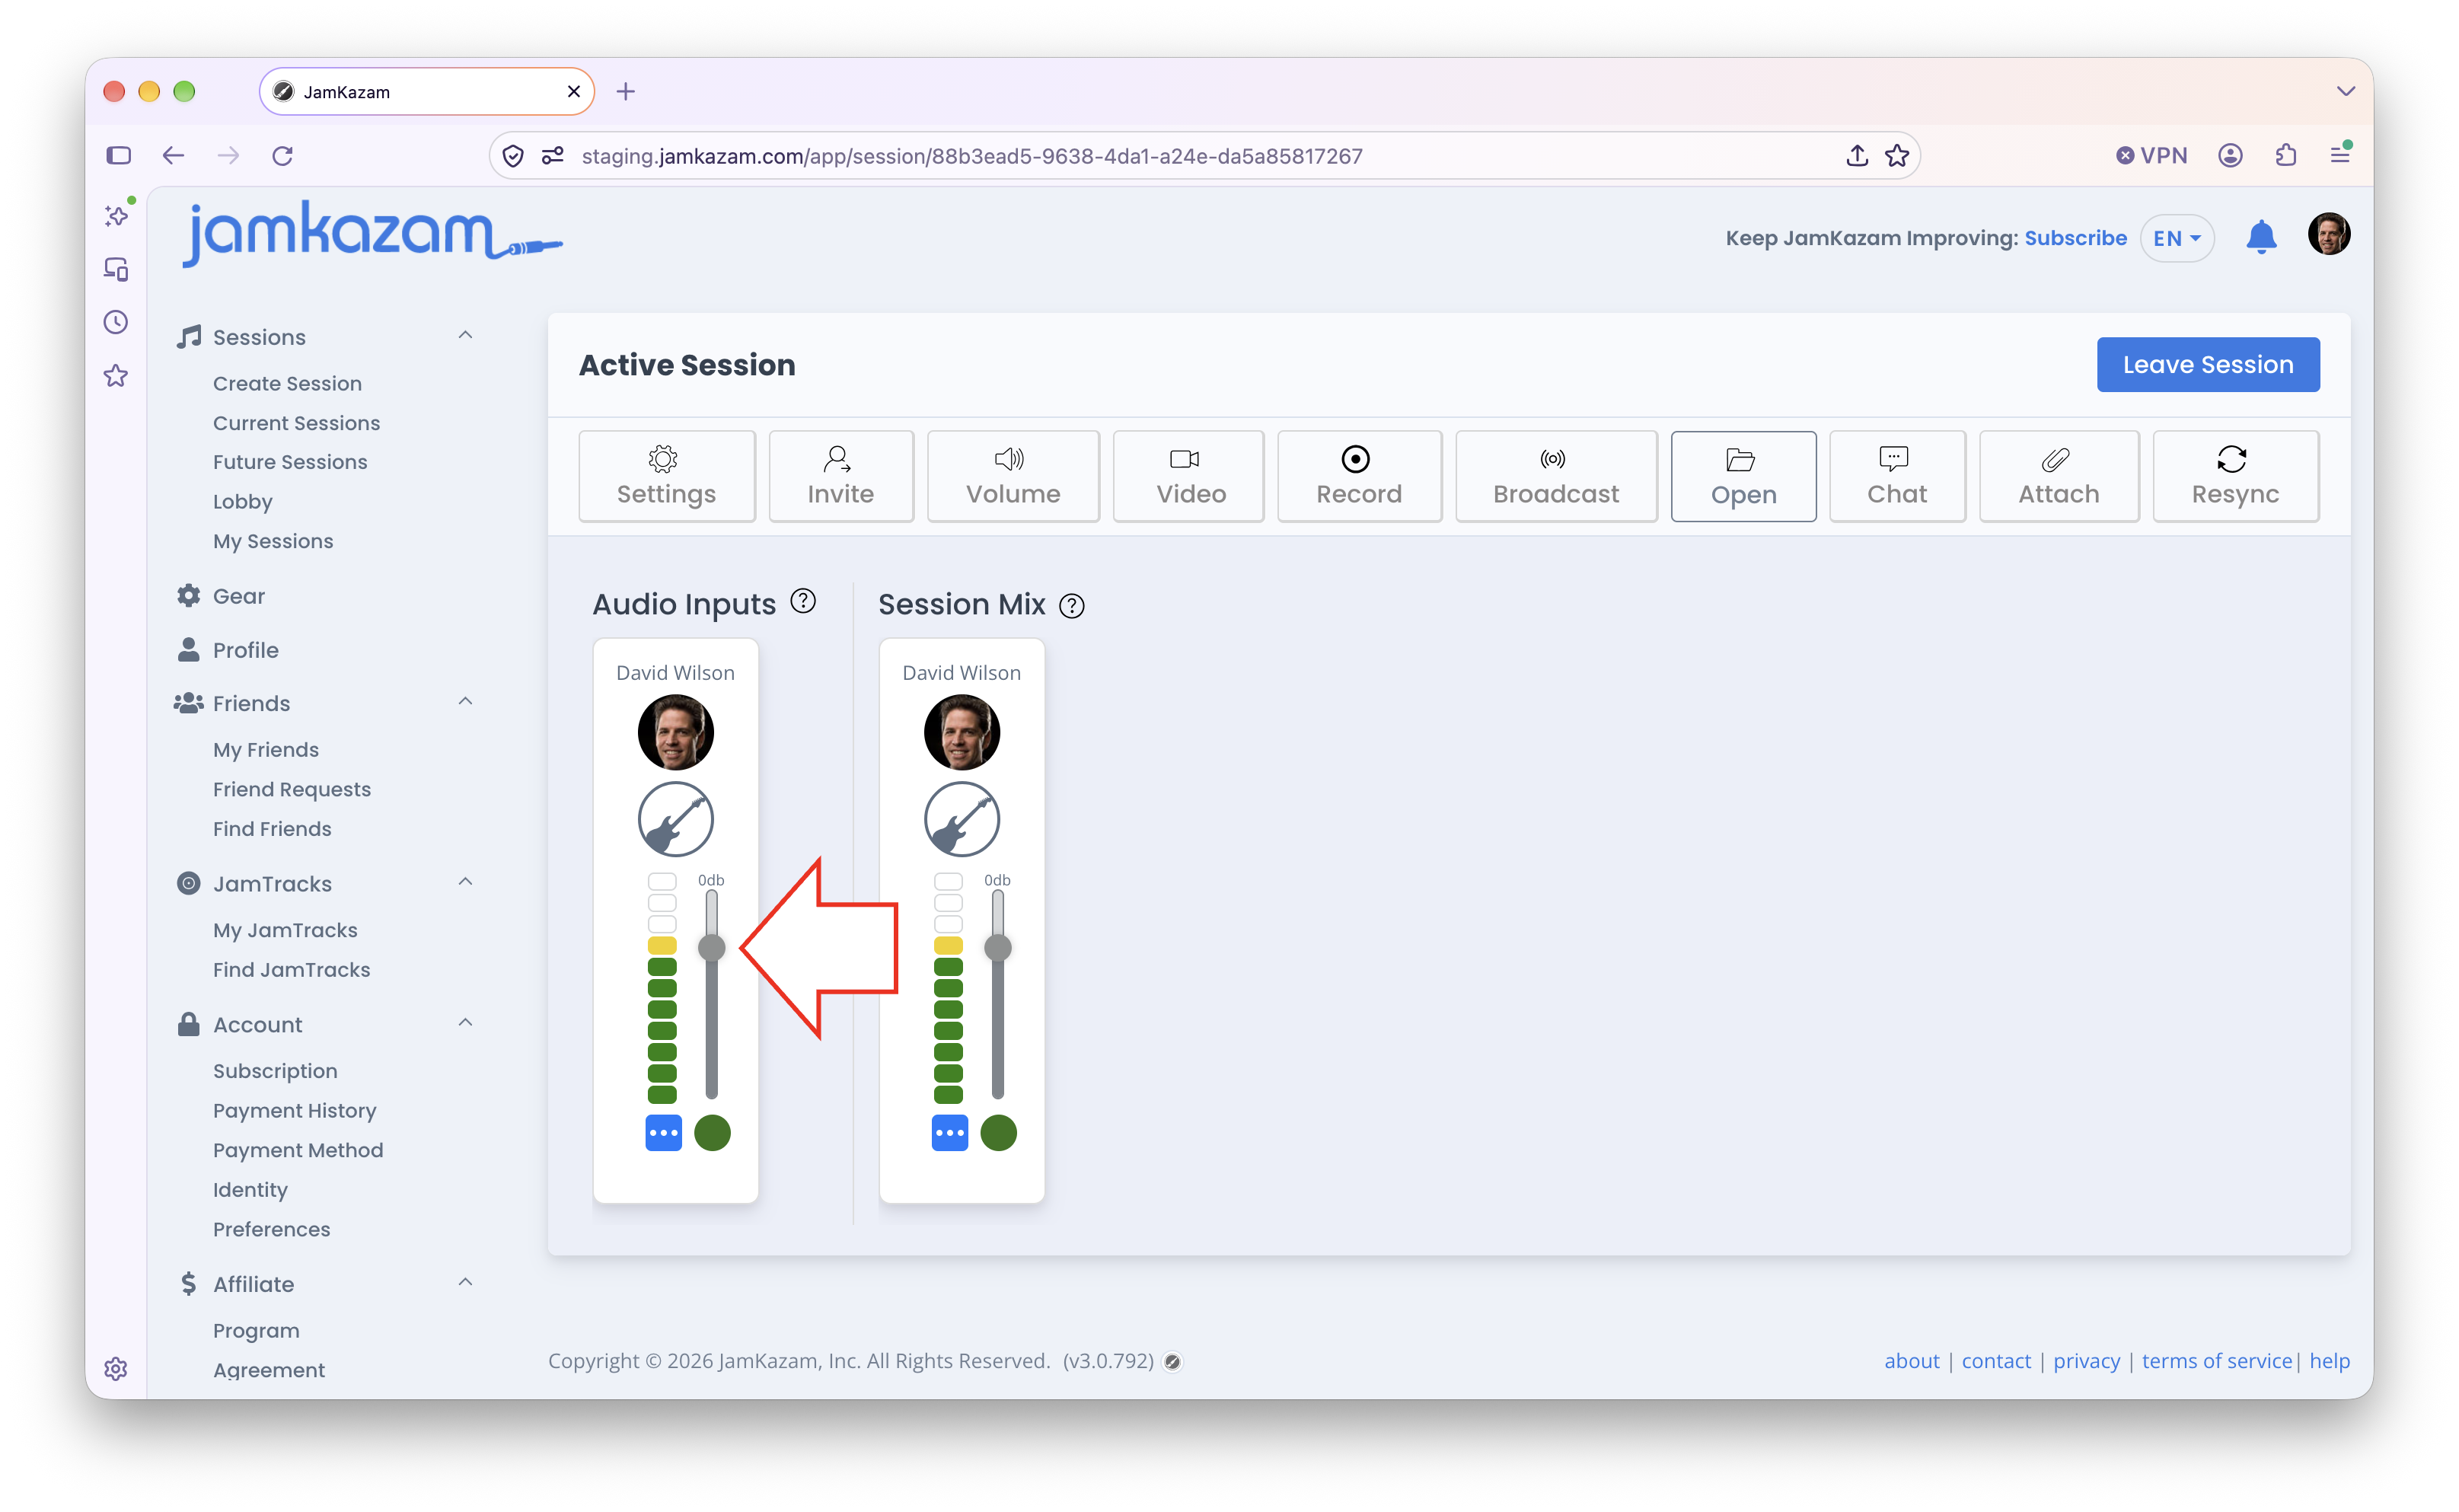
Alternatively, you can pull the slider up in the JamKazam app to increase the gain/input level from inside our app (see below with arrow). When you have the meters lighting up to the right target level for your audio inputs, you're all set on input levels.
 After you have set your audio input levels visually, by watching the VU meter in the manner described above, we recommend you next set your headphone volume. With your input levels already set, put on the headphones that are connected to your audio interface and play and/or sing. Turn the headphone volume knob on your audio interface to set the volume where it sounds good and comfortable to you, and you're ready to go!
If you leave the gain knobs and headphone volume where they are between sessions and don't change them, you shouldn't need to reset or re-test your audio input levels again. But if you do change them, remember to run back through this process to set them properly again the next time you're going to join a JamKazam session.
Troubleshooting
If the meter lights do not light up or move at all, this means you're not getting any input signal at all, and something is not set up right. A few things to check include:
- Try turning the gain knob much higher on your audio interface. Sometimes you have to turn this knob pretty far to get a decent signal.
- Make sure your microphone or instrument is connected properly to the audio interface input port.
- If you are using a microphone, check to see if your microphone has an on/off switch, and if so that it is turned on.
- If you are using an electronic instrument, make sure the instrument is powered on, and that the volume is turned up on the instrument.
If your VU meter lights look right, but you cannot hear yourself clearly and comfortable in your headphones, even with the headphone volume know turned all the way up, there is a likely cause for this. Most audio interfaces are powered by the USB port on your computer, which means the amount of power available to the audio interface is more limited than if it were plugged into a power outlet on the wall. Some headphones can have an "impedance" mismatch with this setup, which means they can't get enough power to deliver the volume you want/need. This is not a common problem, but we've seen it here and there. If this happens to you, there are two ways you can remedy this:
- Try a different pair of headphones (if you have another pair available), or buy another pair of headphones.
- Get a headphone amplifier. Connect the headphone amplified to the headphone port on your audio interface, and connect your headphones to the headphone amplifier. This amplifier will have its own volume knob and power, and it can boost the volume as high as you want to go.