
A chat microphone lets you voice chat between songs with other musicians in a session. If you already have a mic connected to your audio interface and set up as an audio track for vocals or an instrument, you can often use that mic to chat in sessions, with no need to set up a chat mic track. However, for a musician who just has an electric guitar connected to their interface (for example), they may want to use the microphone built into their laptop to chat between songs, rather than buying a microphone, connecting it to their interface using an XLR cable, and setting it up on a mic stand.
To set up a chat mic track, click the Add Chat Mic button in the left column of the gear setup wizard. The Add Chat Mic dialog box is displayed (pictured below).
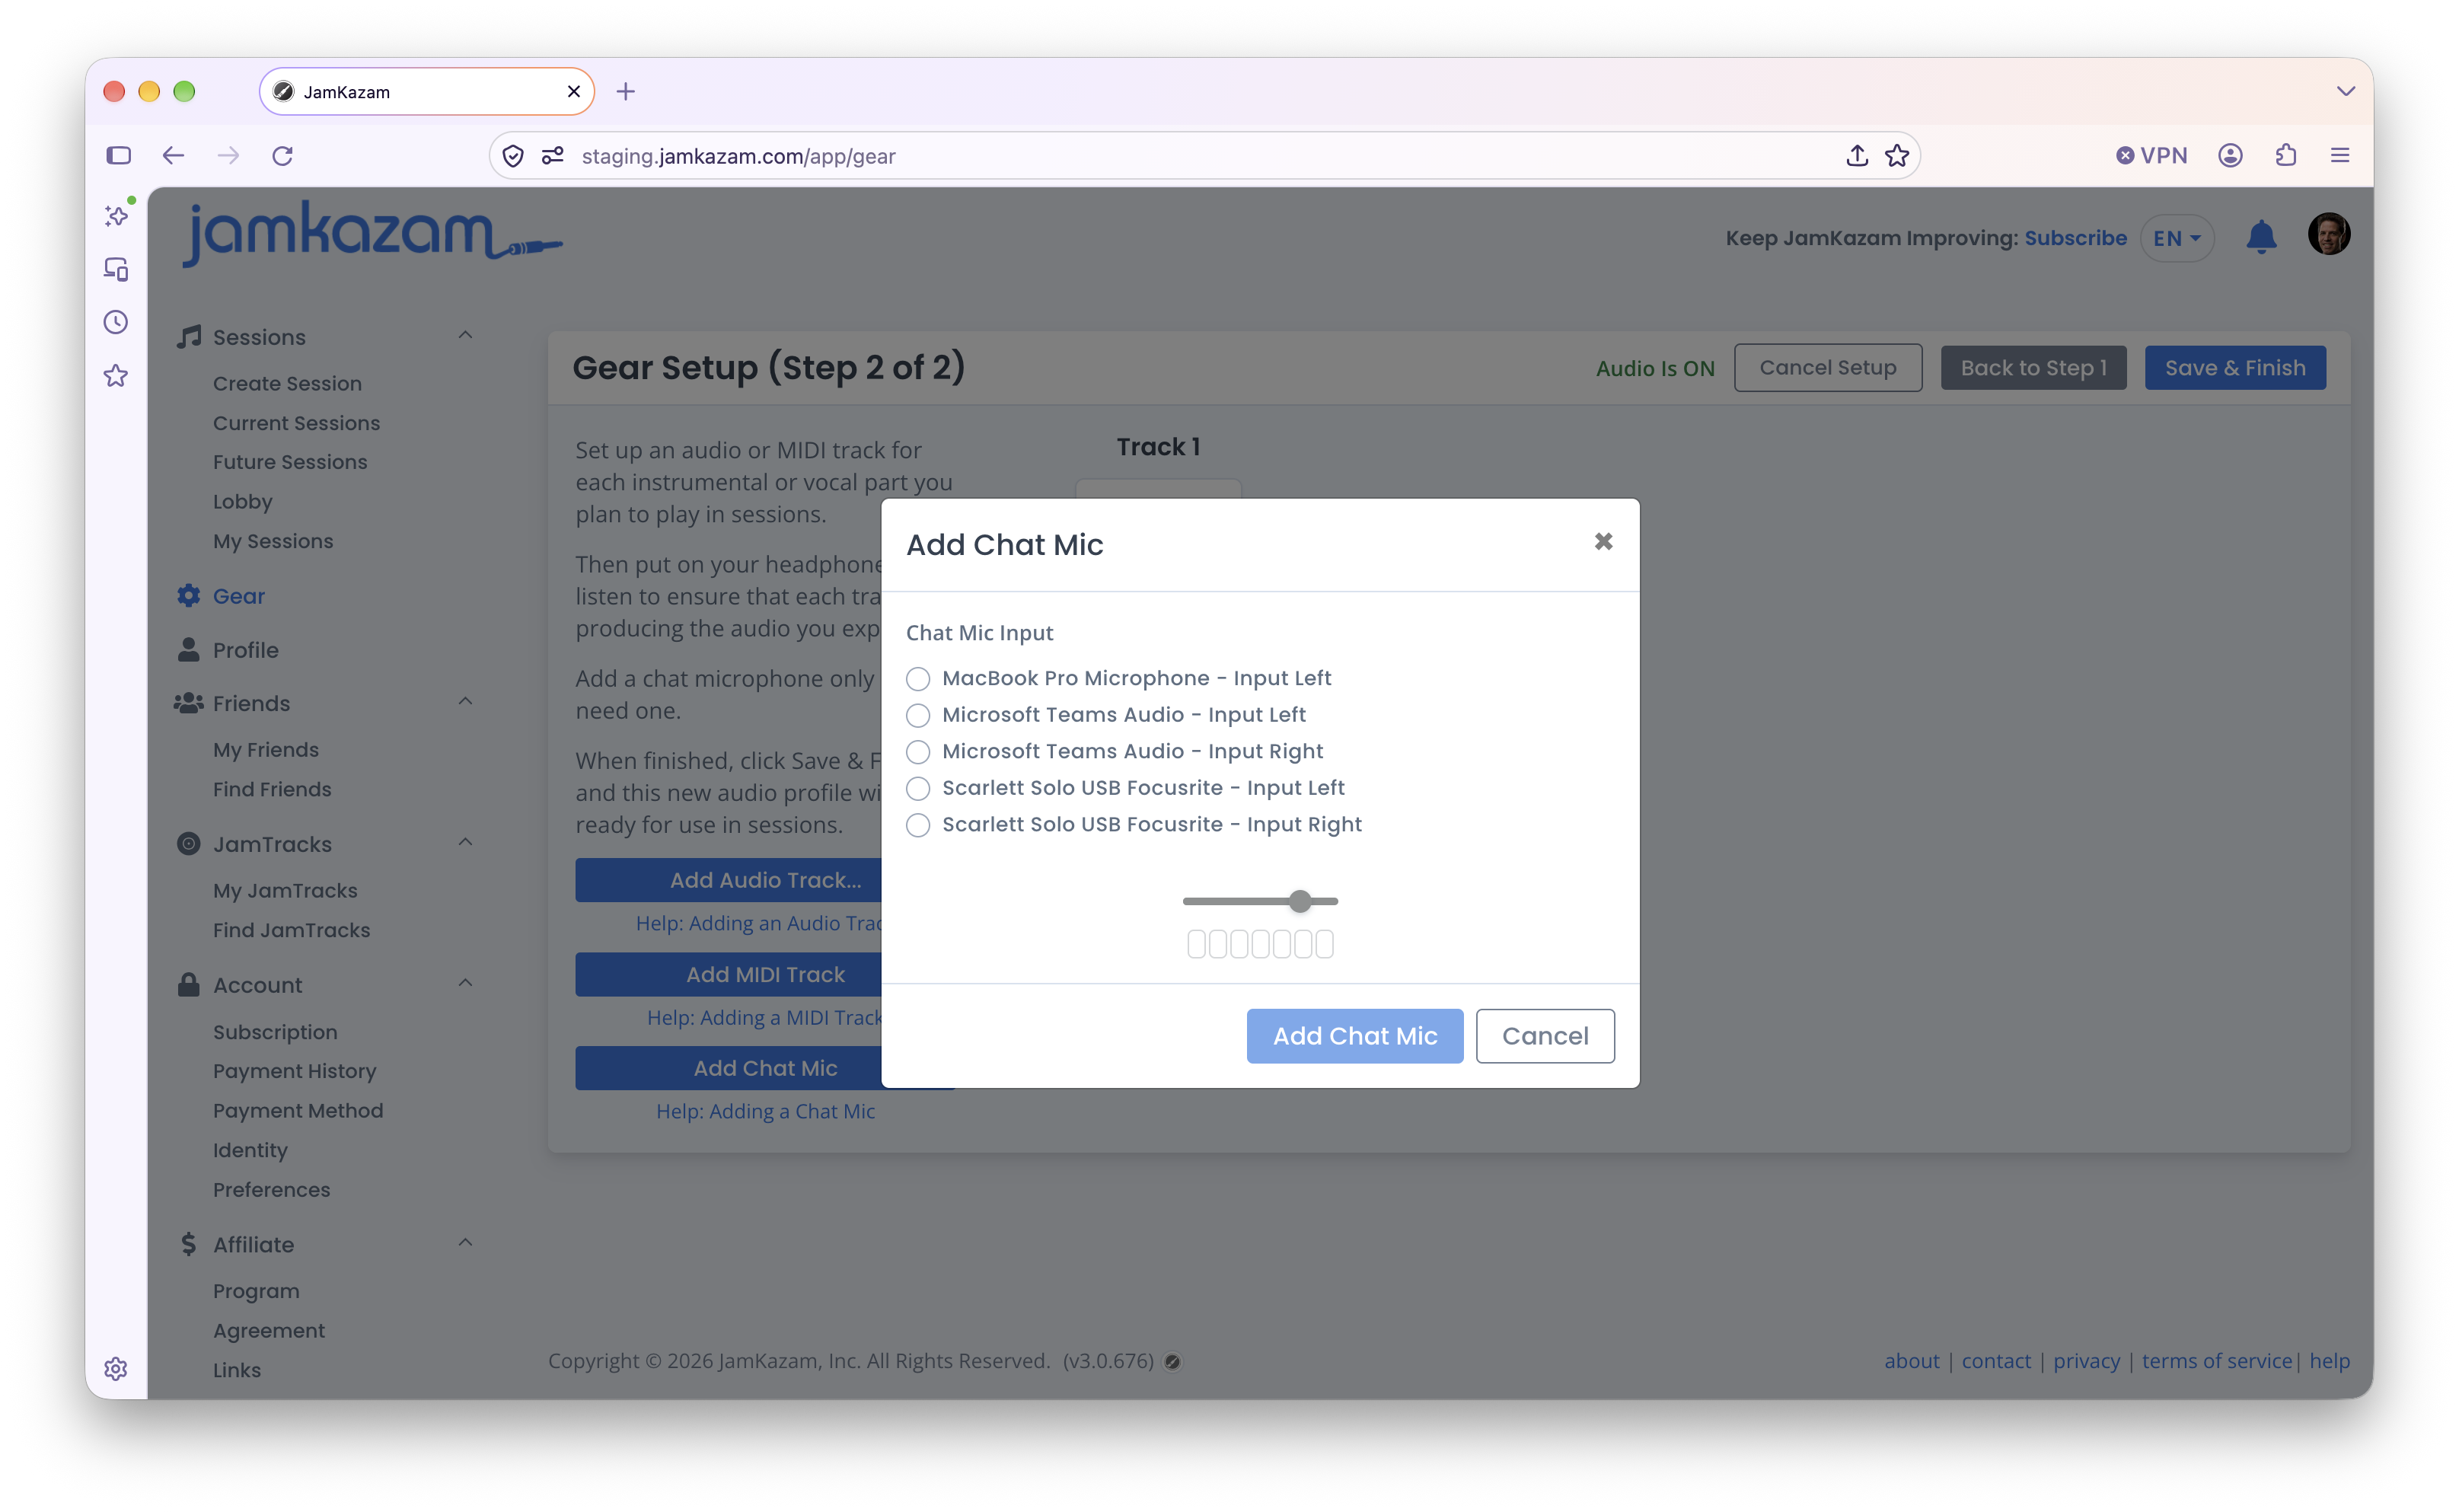
Simply select the device from the displayed list that you want to use as your chat mic. If you’re using the built-in mic on your laptop, which is common for this purpose, it will usually be labeled in the list as a “Microphone” (often along with some other text). If you see both Left and Right options for a microphone in the list, it usually doesn’t matter which you choose. If you’re confused about the options, you can try selecting an option and then talking while wearing headphones connected to your audio interface, to see if you hear yourself talking. If you hear yourself, then you’ve made a valid selection that will work in JamKazam sessions. After selecting your preferred mic, click the Add Chat Mic button, and you will see the track created and displayed in the gear wizard window.