
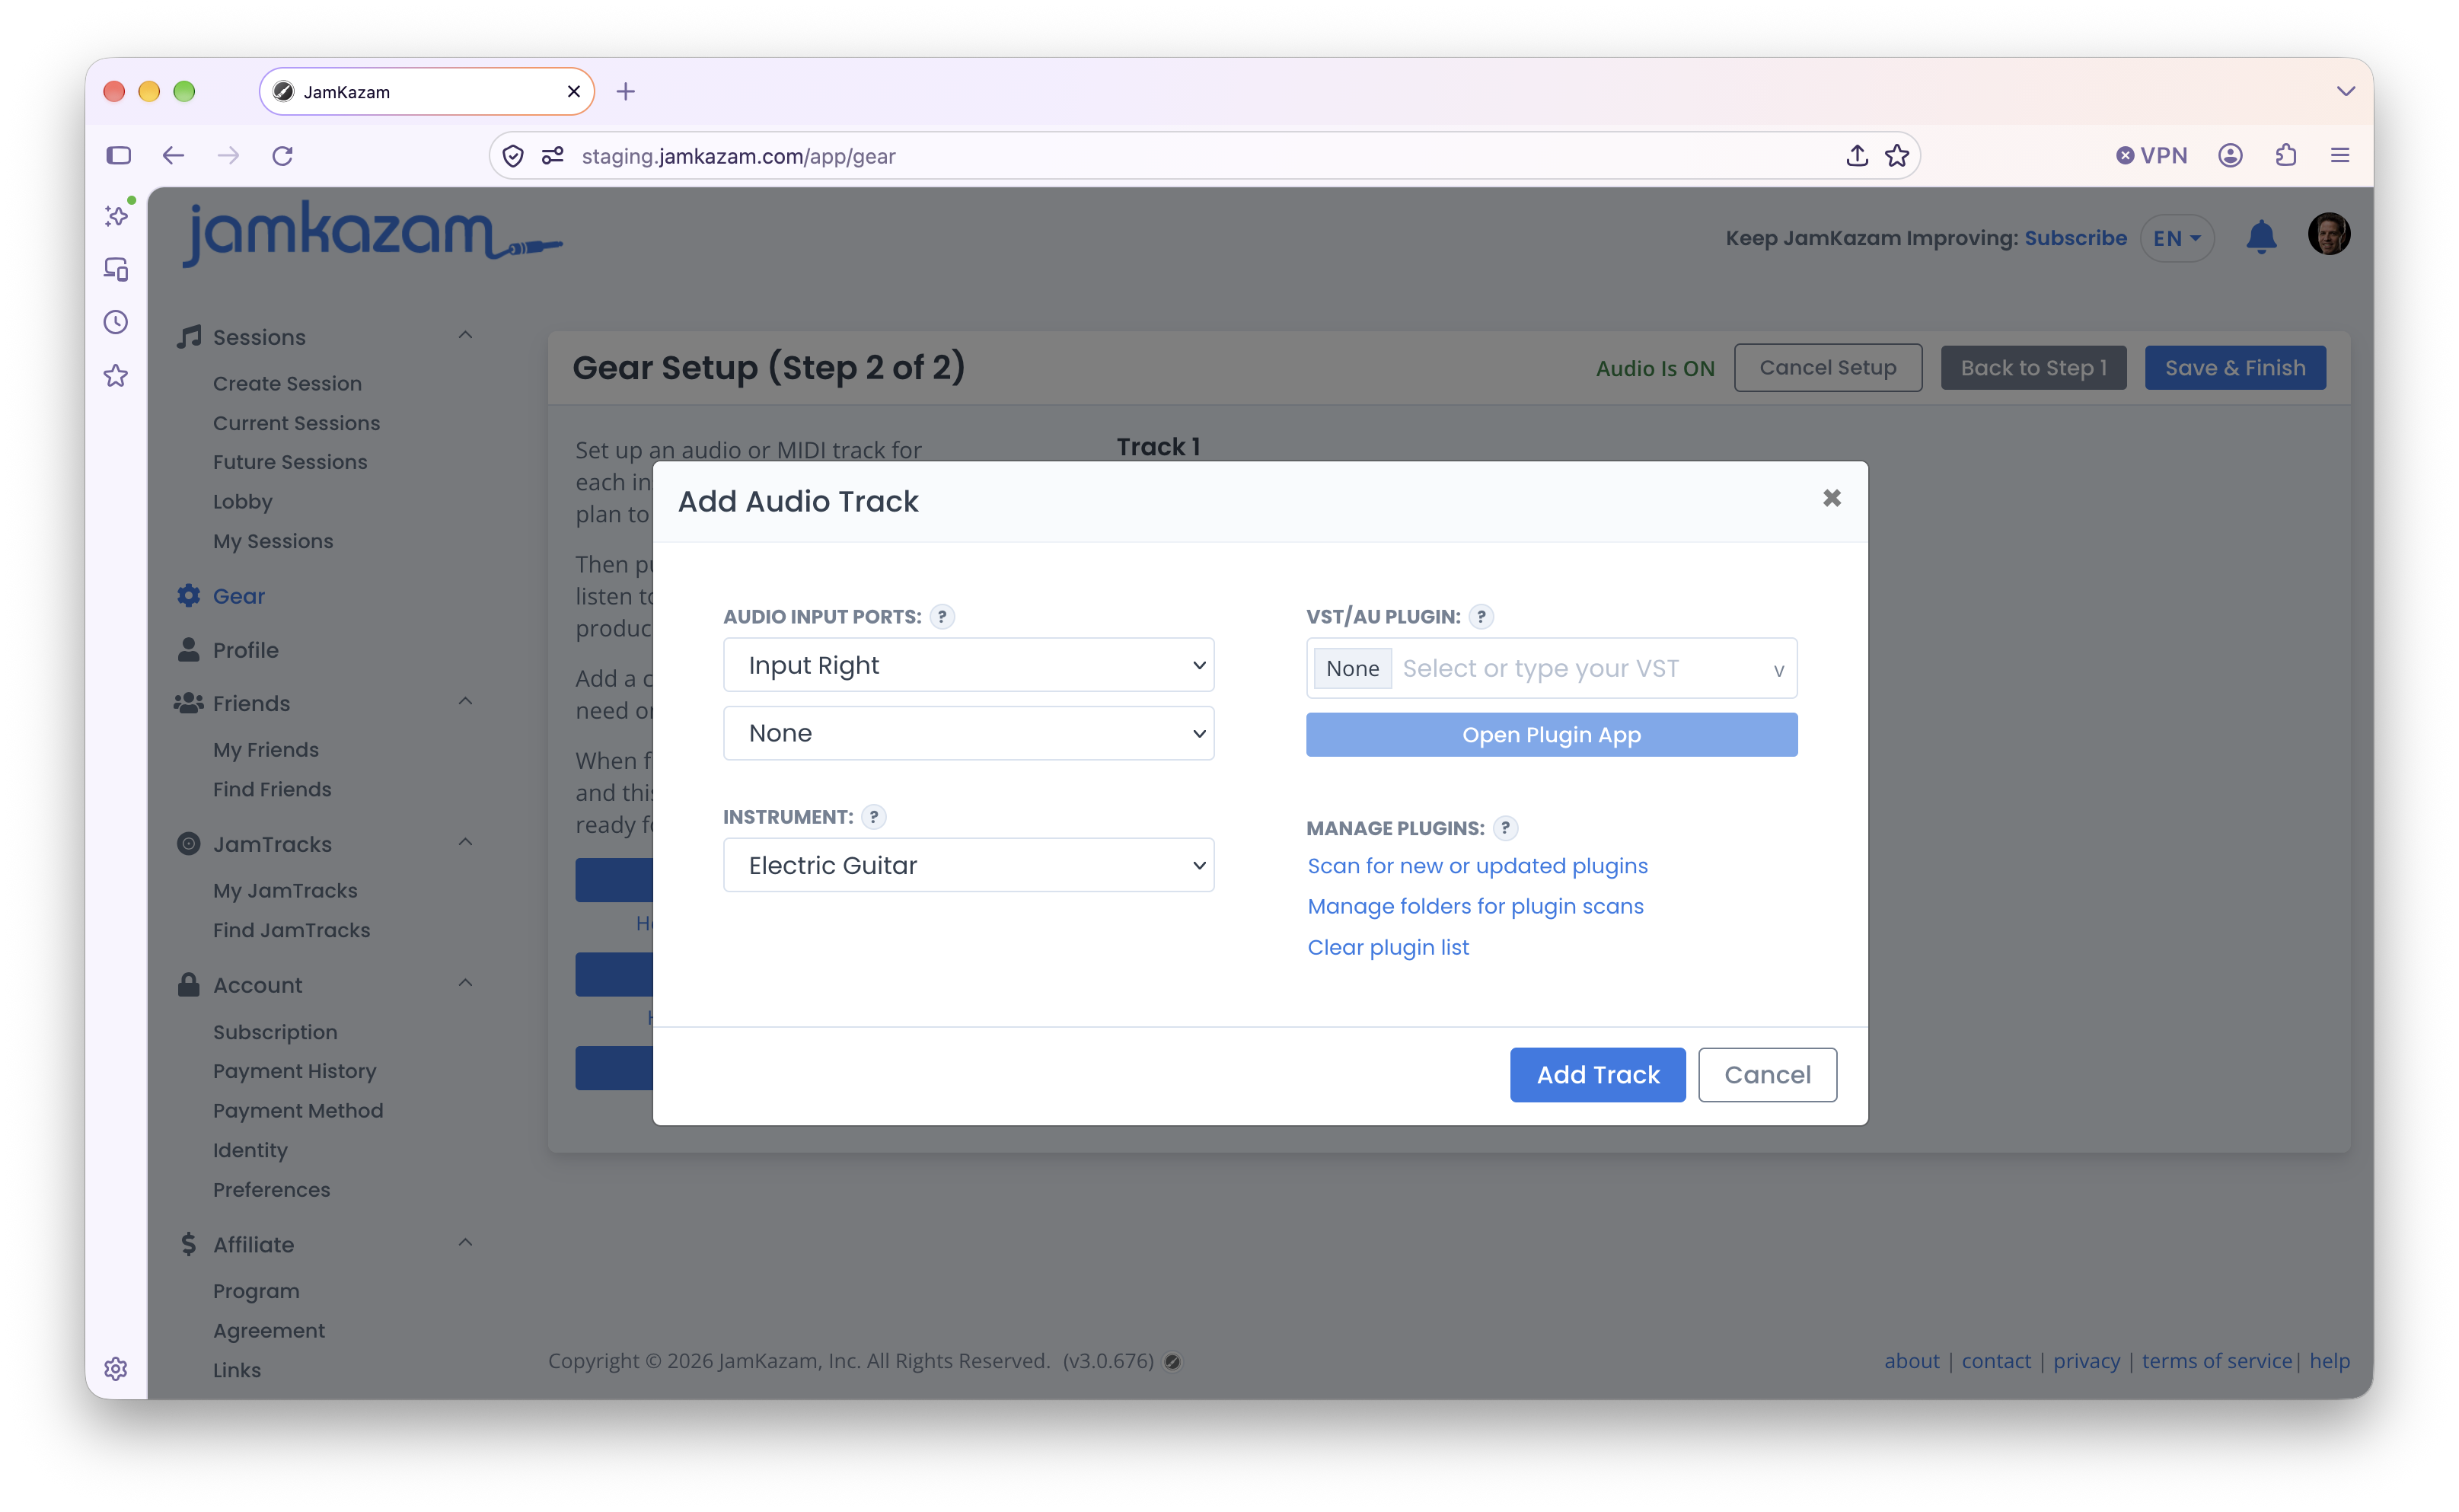
Audio tracks are used for microphones and for instruments that generate an audio signal, like electric or bass guitar. To set up an audio track, click the Add Audio Track button in the left column of the gear setup wizard. The Add Audio Track dialog box is displayed (pictured below).
Selecting Input Ports
Start by selecting which input port(s) you want to use for this track. If you are using a microphone or an instrument like an electric or bass guitar, simply select the single input port to which you have connected the mic or instrument on your audio interface, and leave the other input port set to None. Note JamKazam will automatically convert the mono signal from the mic or instrument into a balanced stereo signal, so you’ll hear yourself equally in both ears. You can use pan controls in JamKazam sessions if you want to push your audio left or right in the session mix.
If you are a multi-instrumentalist using a mixer for all your gear, you’ll likely want to connect the left and right outputs from your mixer to two input ports on your audio interface and select both input ports for this track.
Selecting Your Instrument
Next, select the instrument or vocal for which you are setting up this track – e.g. Electric Guitar, Keyboard, Voice, etc. This will be displayed on the track in JamKazam sessions, which will help you easily identify and manage each of your tracks (e.g. setting levels in the mix, etc.).
Using Virtual Instrument Plugins
Finally, if you want to use a plugin on this track, you can use the controls on the right side of the dialog box to do this. For example, electric guitar players often use VST plugins to apply a variety of different tones to their guitar signal. To apply a plugin to this track, simply click in the plugin list box. A list of the plugins available on your computer is displayed. Select the one you want to assign to this track. If you have a lot of plugins, you can start typing the name of the plugin you want to use, and the list box will be filtered to just the plugin names that match what you’ve typed.
If you don’t see your plugin in the list box, click the “Scan for new or updated plugins” text link. This causes JamKazam to scan your computer in the folders where plugins are typically stored to find all your plugins and add them to the list box. When this is done, click the plugin list box again to see if your plugin shows up.
If your plugin still isn’t listed, check to be sure the plugin is installed on your computer, and take note of the folder/directory location where the plugin is installed. Then click the “Manage folders for plugin scans” text link. You will see a dialog box that lists all the folders JamKazam is currently scanning to find plugins on your computer (pictured below).
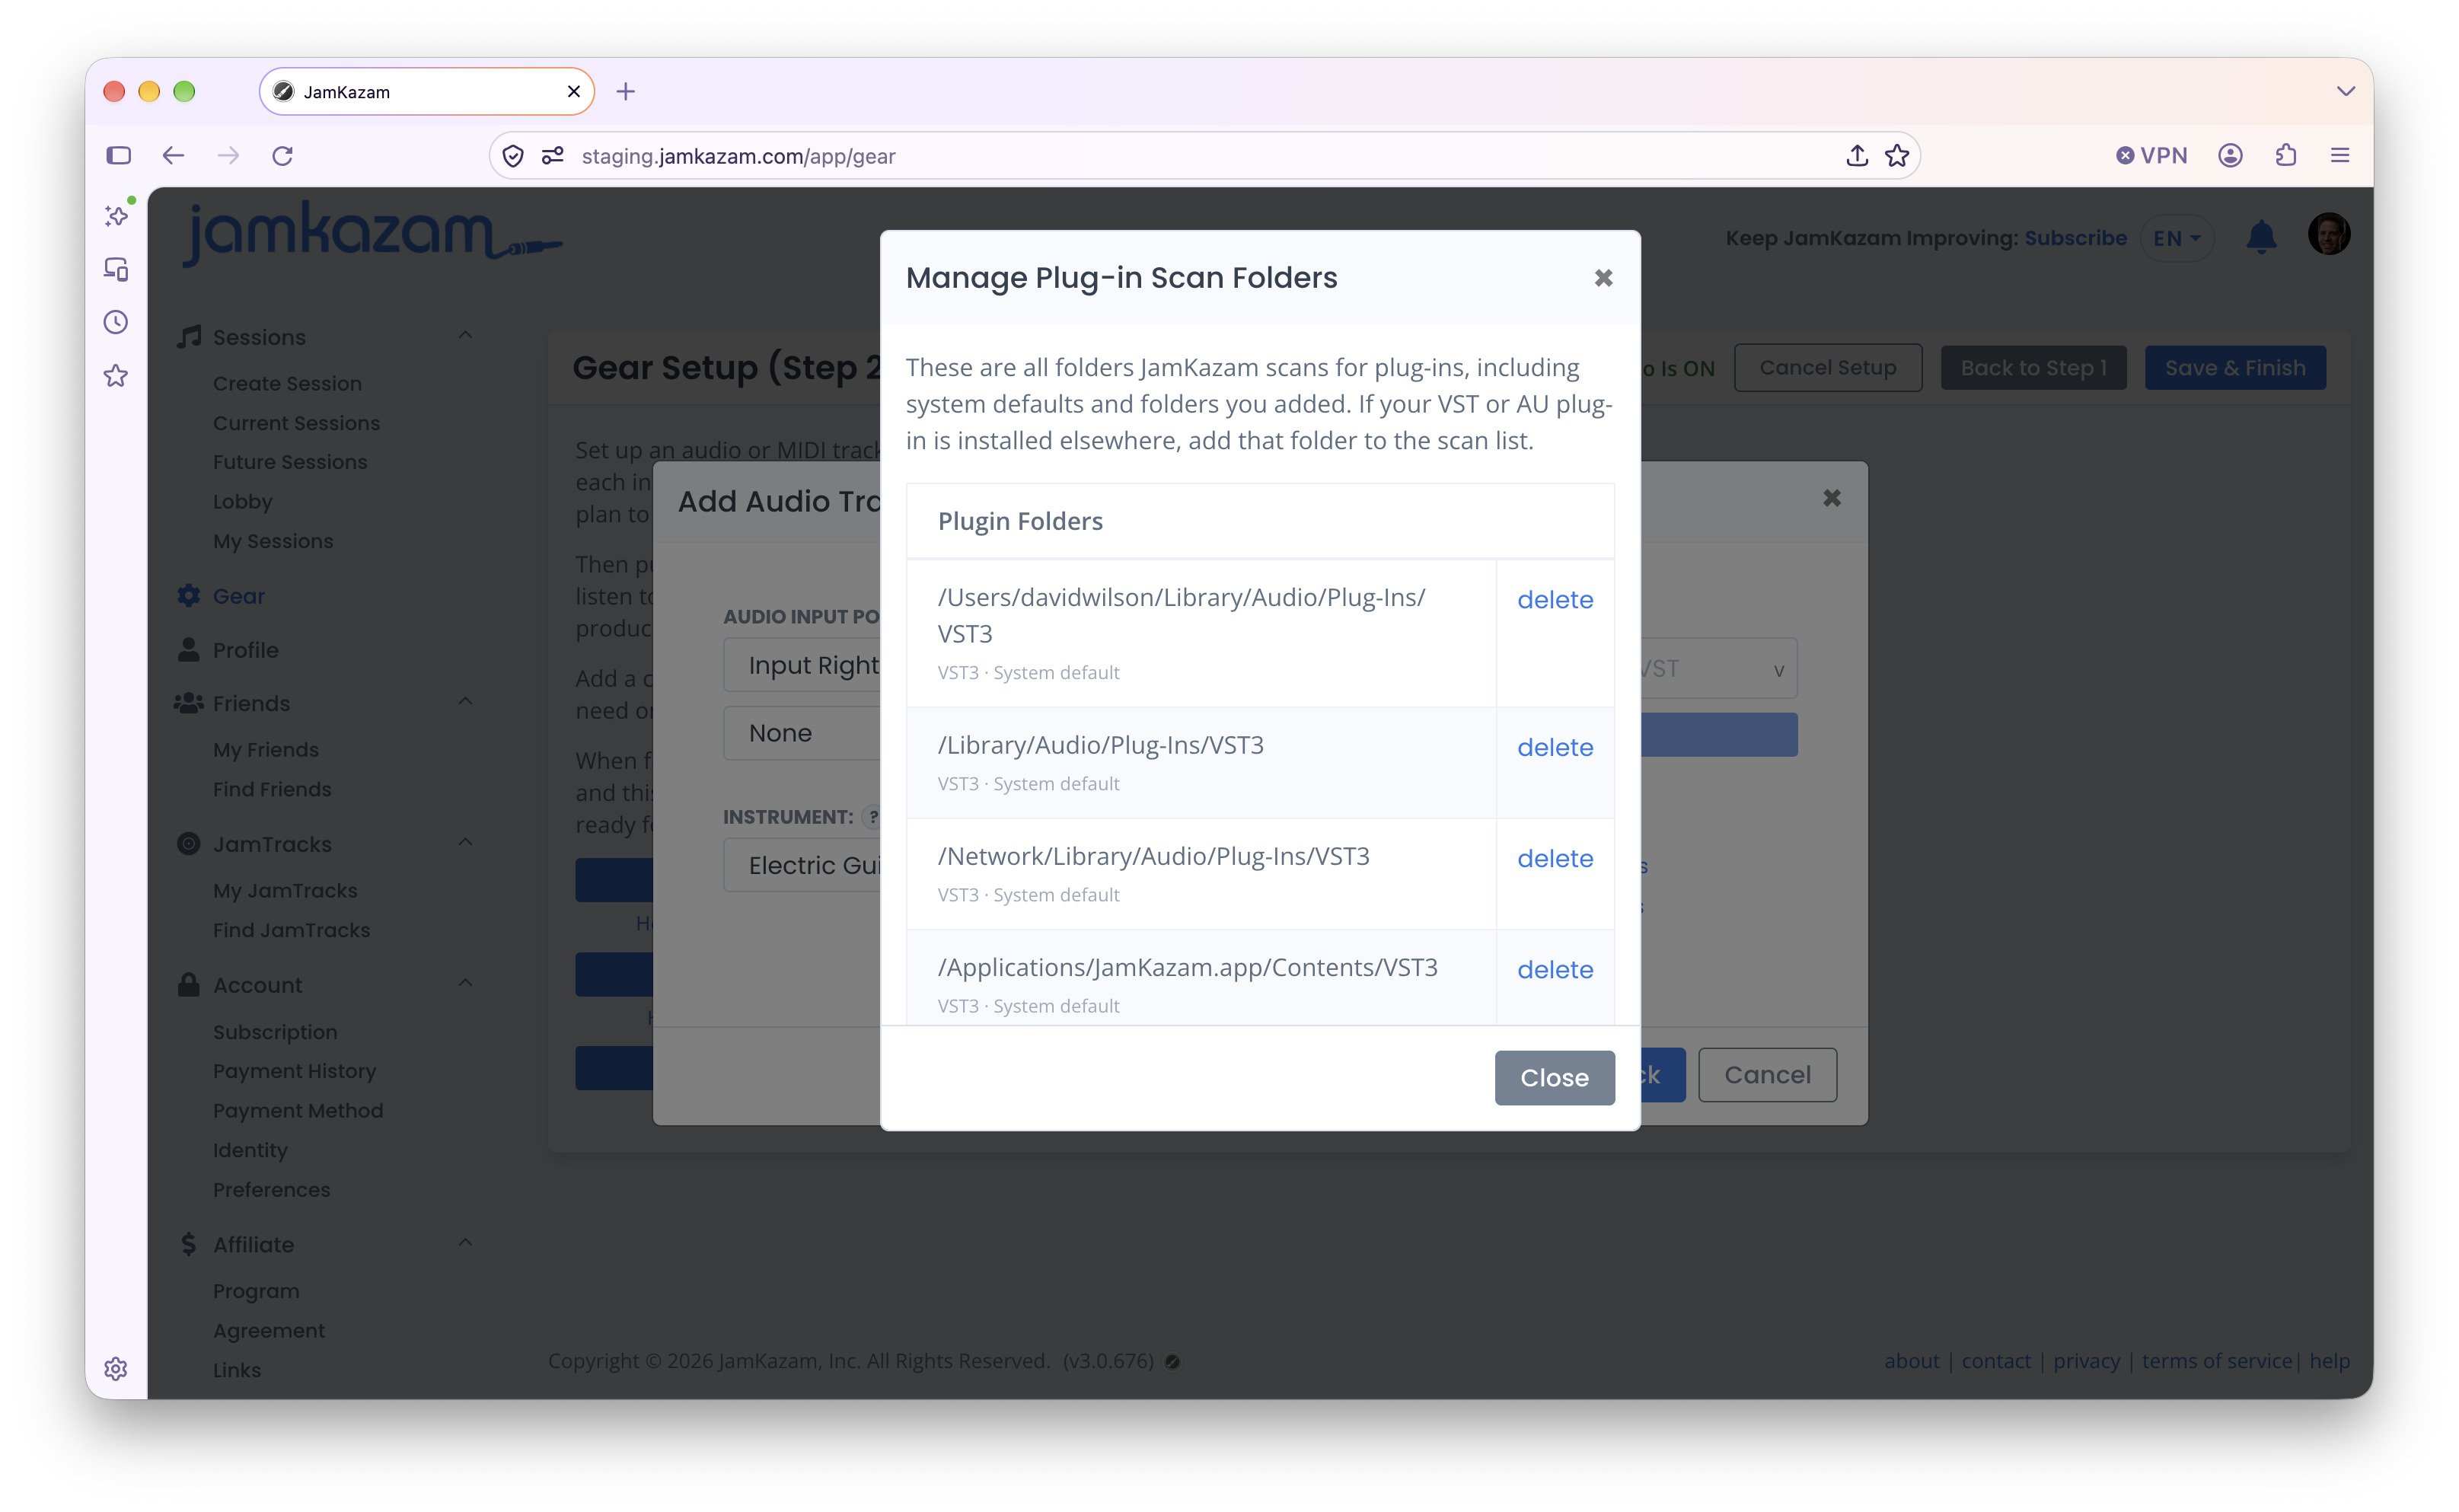
Scroll down through the list of plugin folders to see if the folder where your plugin is installed is in the list. If you don’t see your plugin’s folder here, click the Add Folder button at the bottom of the list, and navigate to that folder on your computer, adding your plugin’s folder location to this list of scanned folders. When this is done, click the “Scan for new or updated plugins” text link. This causes JamKazam to scan your computer, and it should now find your plugin and add it. When this is done, click the plugin list box, and select your plugin from the list.
With your input port(s) and instrument selected, and (optionally) any desired plugin selected, click the Add Track button, and you will see the track created and displayed in the gear wizard window.