
To play in JamKazam online sessions, you need to set up your audio interface with the JamKazam app. This help article explains how to set up your audio interface with JamKazam on a Mac computer.
Before you start the setup process, make sure your audio interface is connected to your Mac. You may also launch the JamKazam app, so that it is running (our app now runs quietly in the background and is controlled through our website) - but if you don't, you will be prompted to start the app from the setup process.
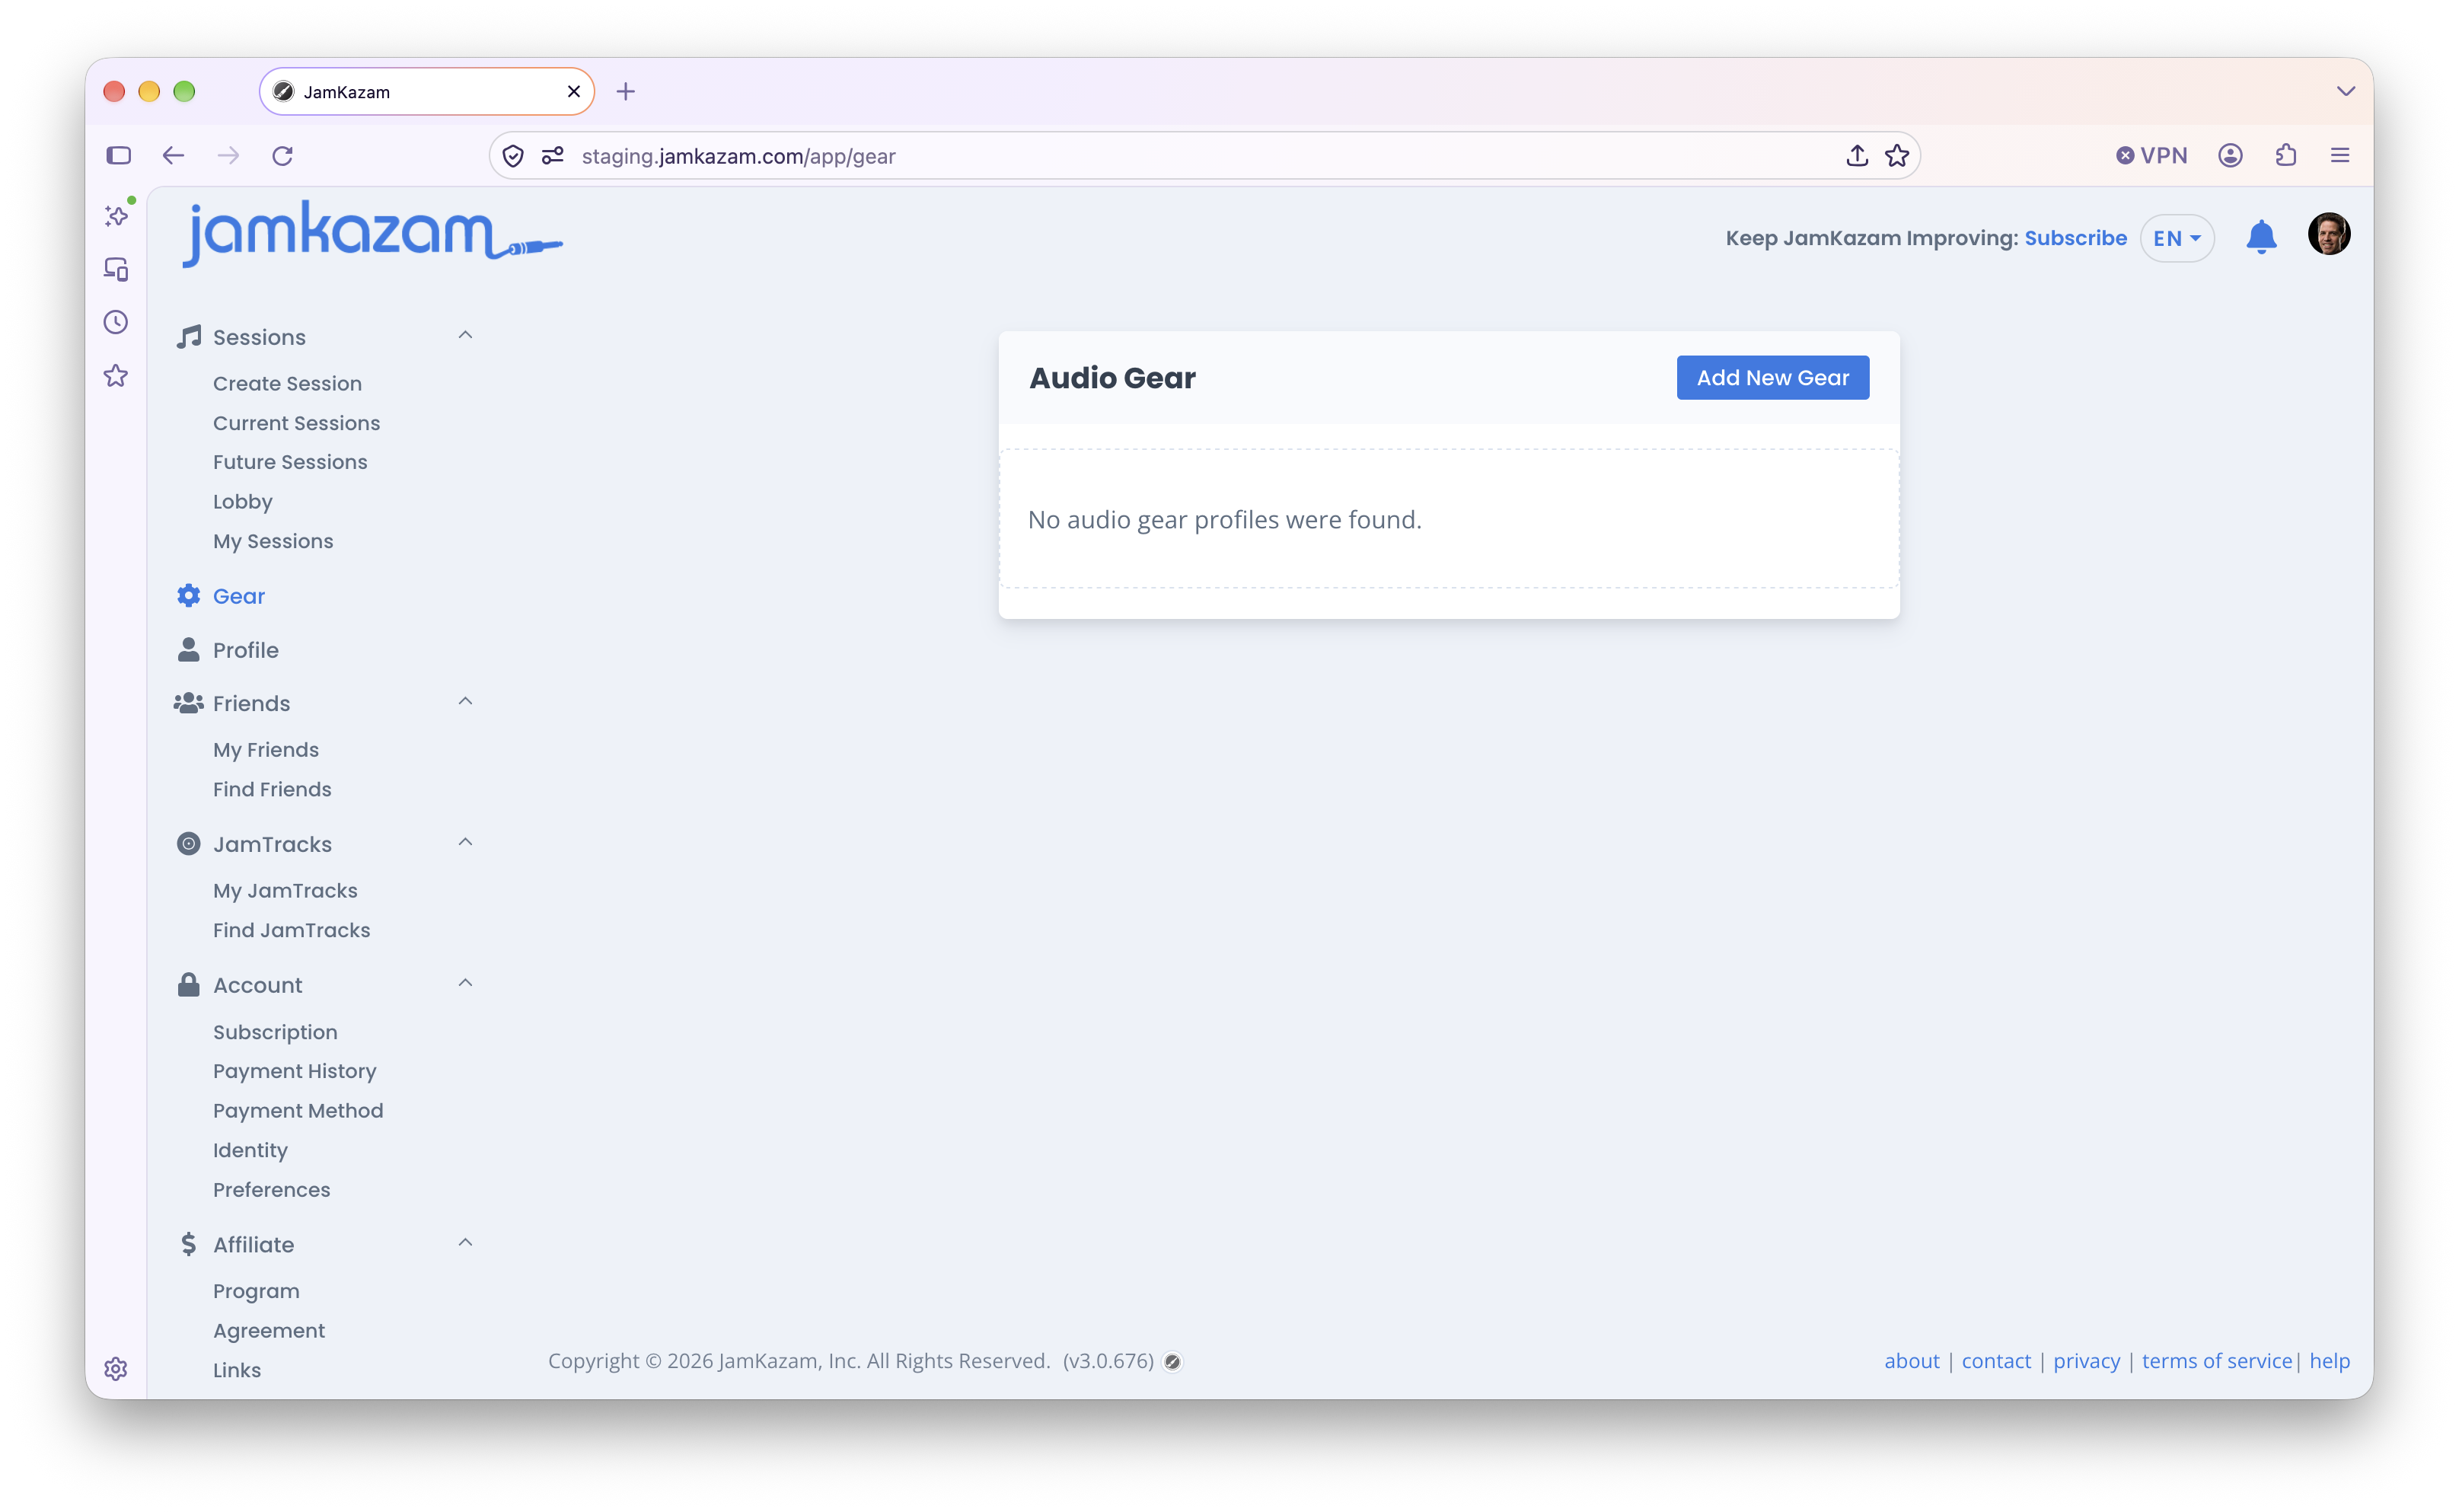
To set up your audio interface, go to https://jamkazam.com/app/gear in your browser, or if you already have the JamKazam website open in your browser, click the Gear option in the left navigation bar. Either way, you'll see the Gear page (pictured below). Click the Add New Gear button.
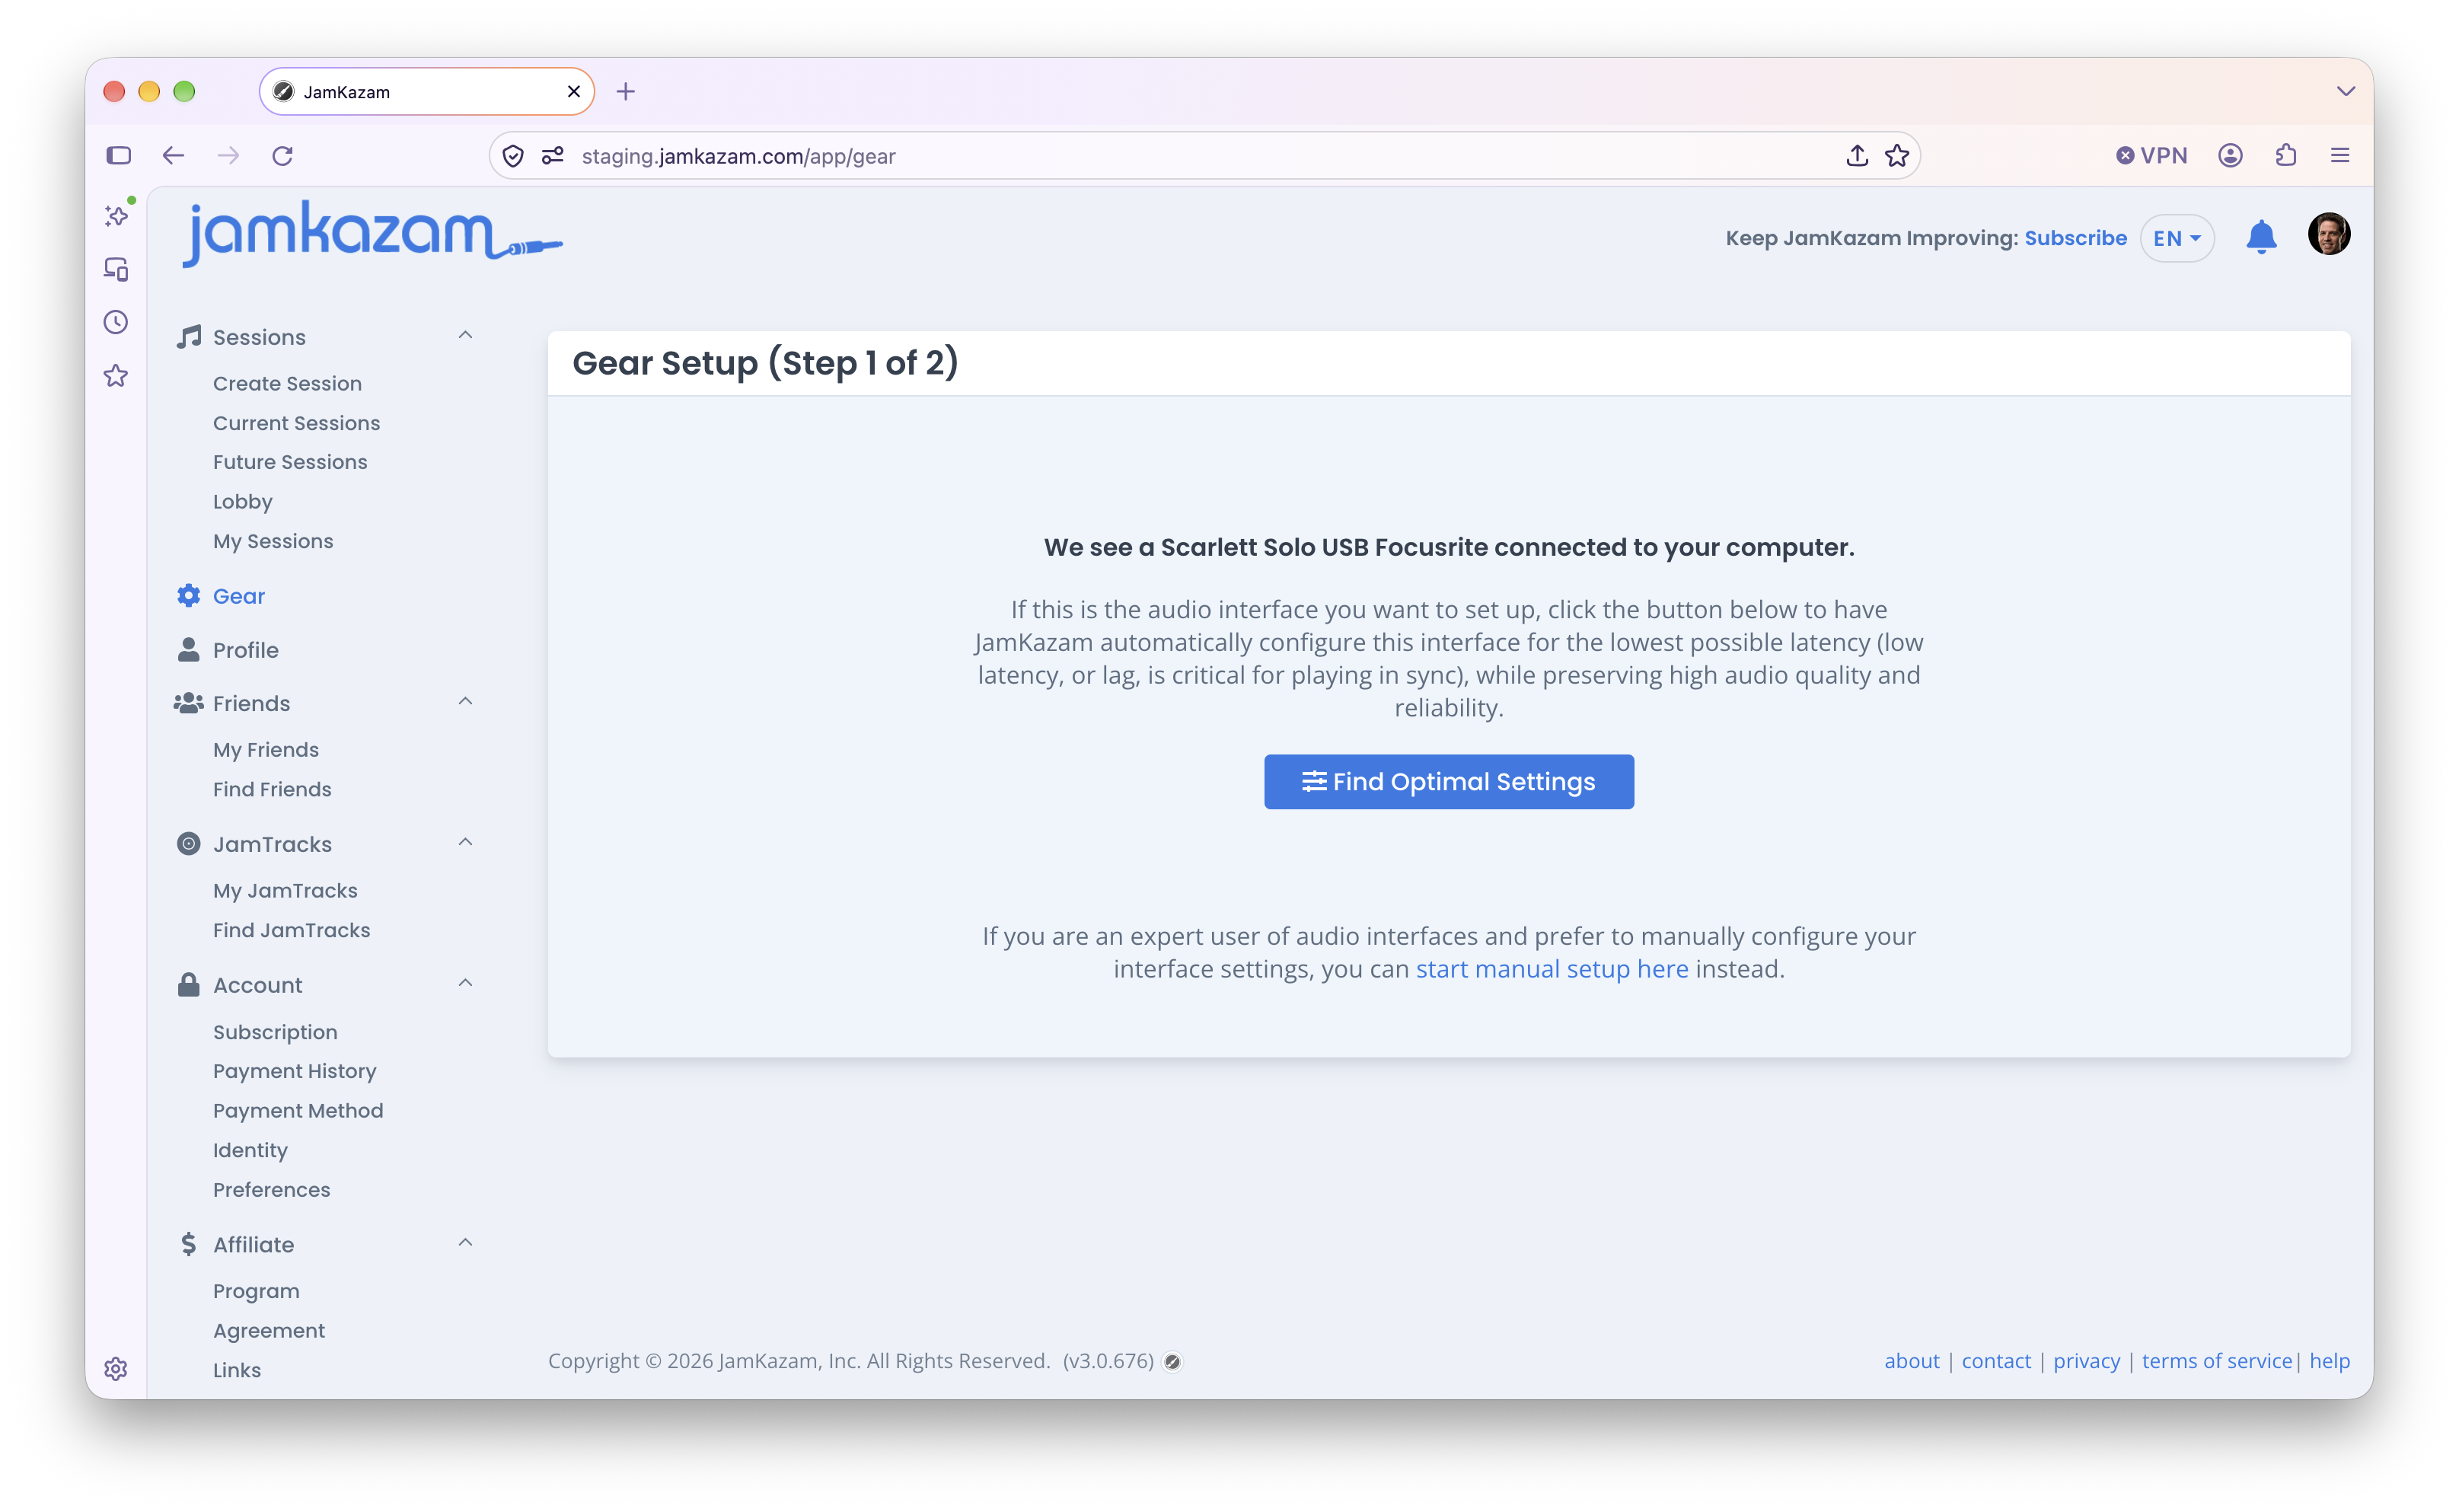
Step 1 of the gear wizard is displayed, in one of three states.
- In most cases, you should see a message that JamKazam sees your audio interface, and you should see a Find Optimal Settings button (pictured below). In this case, you should click the Find Optimal Settings button.
- It's possible (but unlikely) that JamKazam can see your audio interface, but cannot control it to optimize your settings automatically. In this case, you will see a "Manual Configuration Required" message displayed, and you should click the Configure Gear button. If you take this path, skip down to the Manual Interface Setup section of the article for instructions.
- In the worst case, if JamKazam cannot detect your your audio interface, please double check that your audio interface is connected to your computer. If it is, then read this help article for a set of tips and tricks to troubleshoot this problem. If you still cannot get JamKazam to see your interface, we recommend contacting our team at support@jamkazam.com for help.
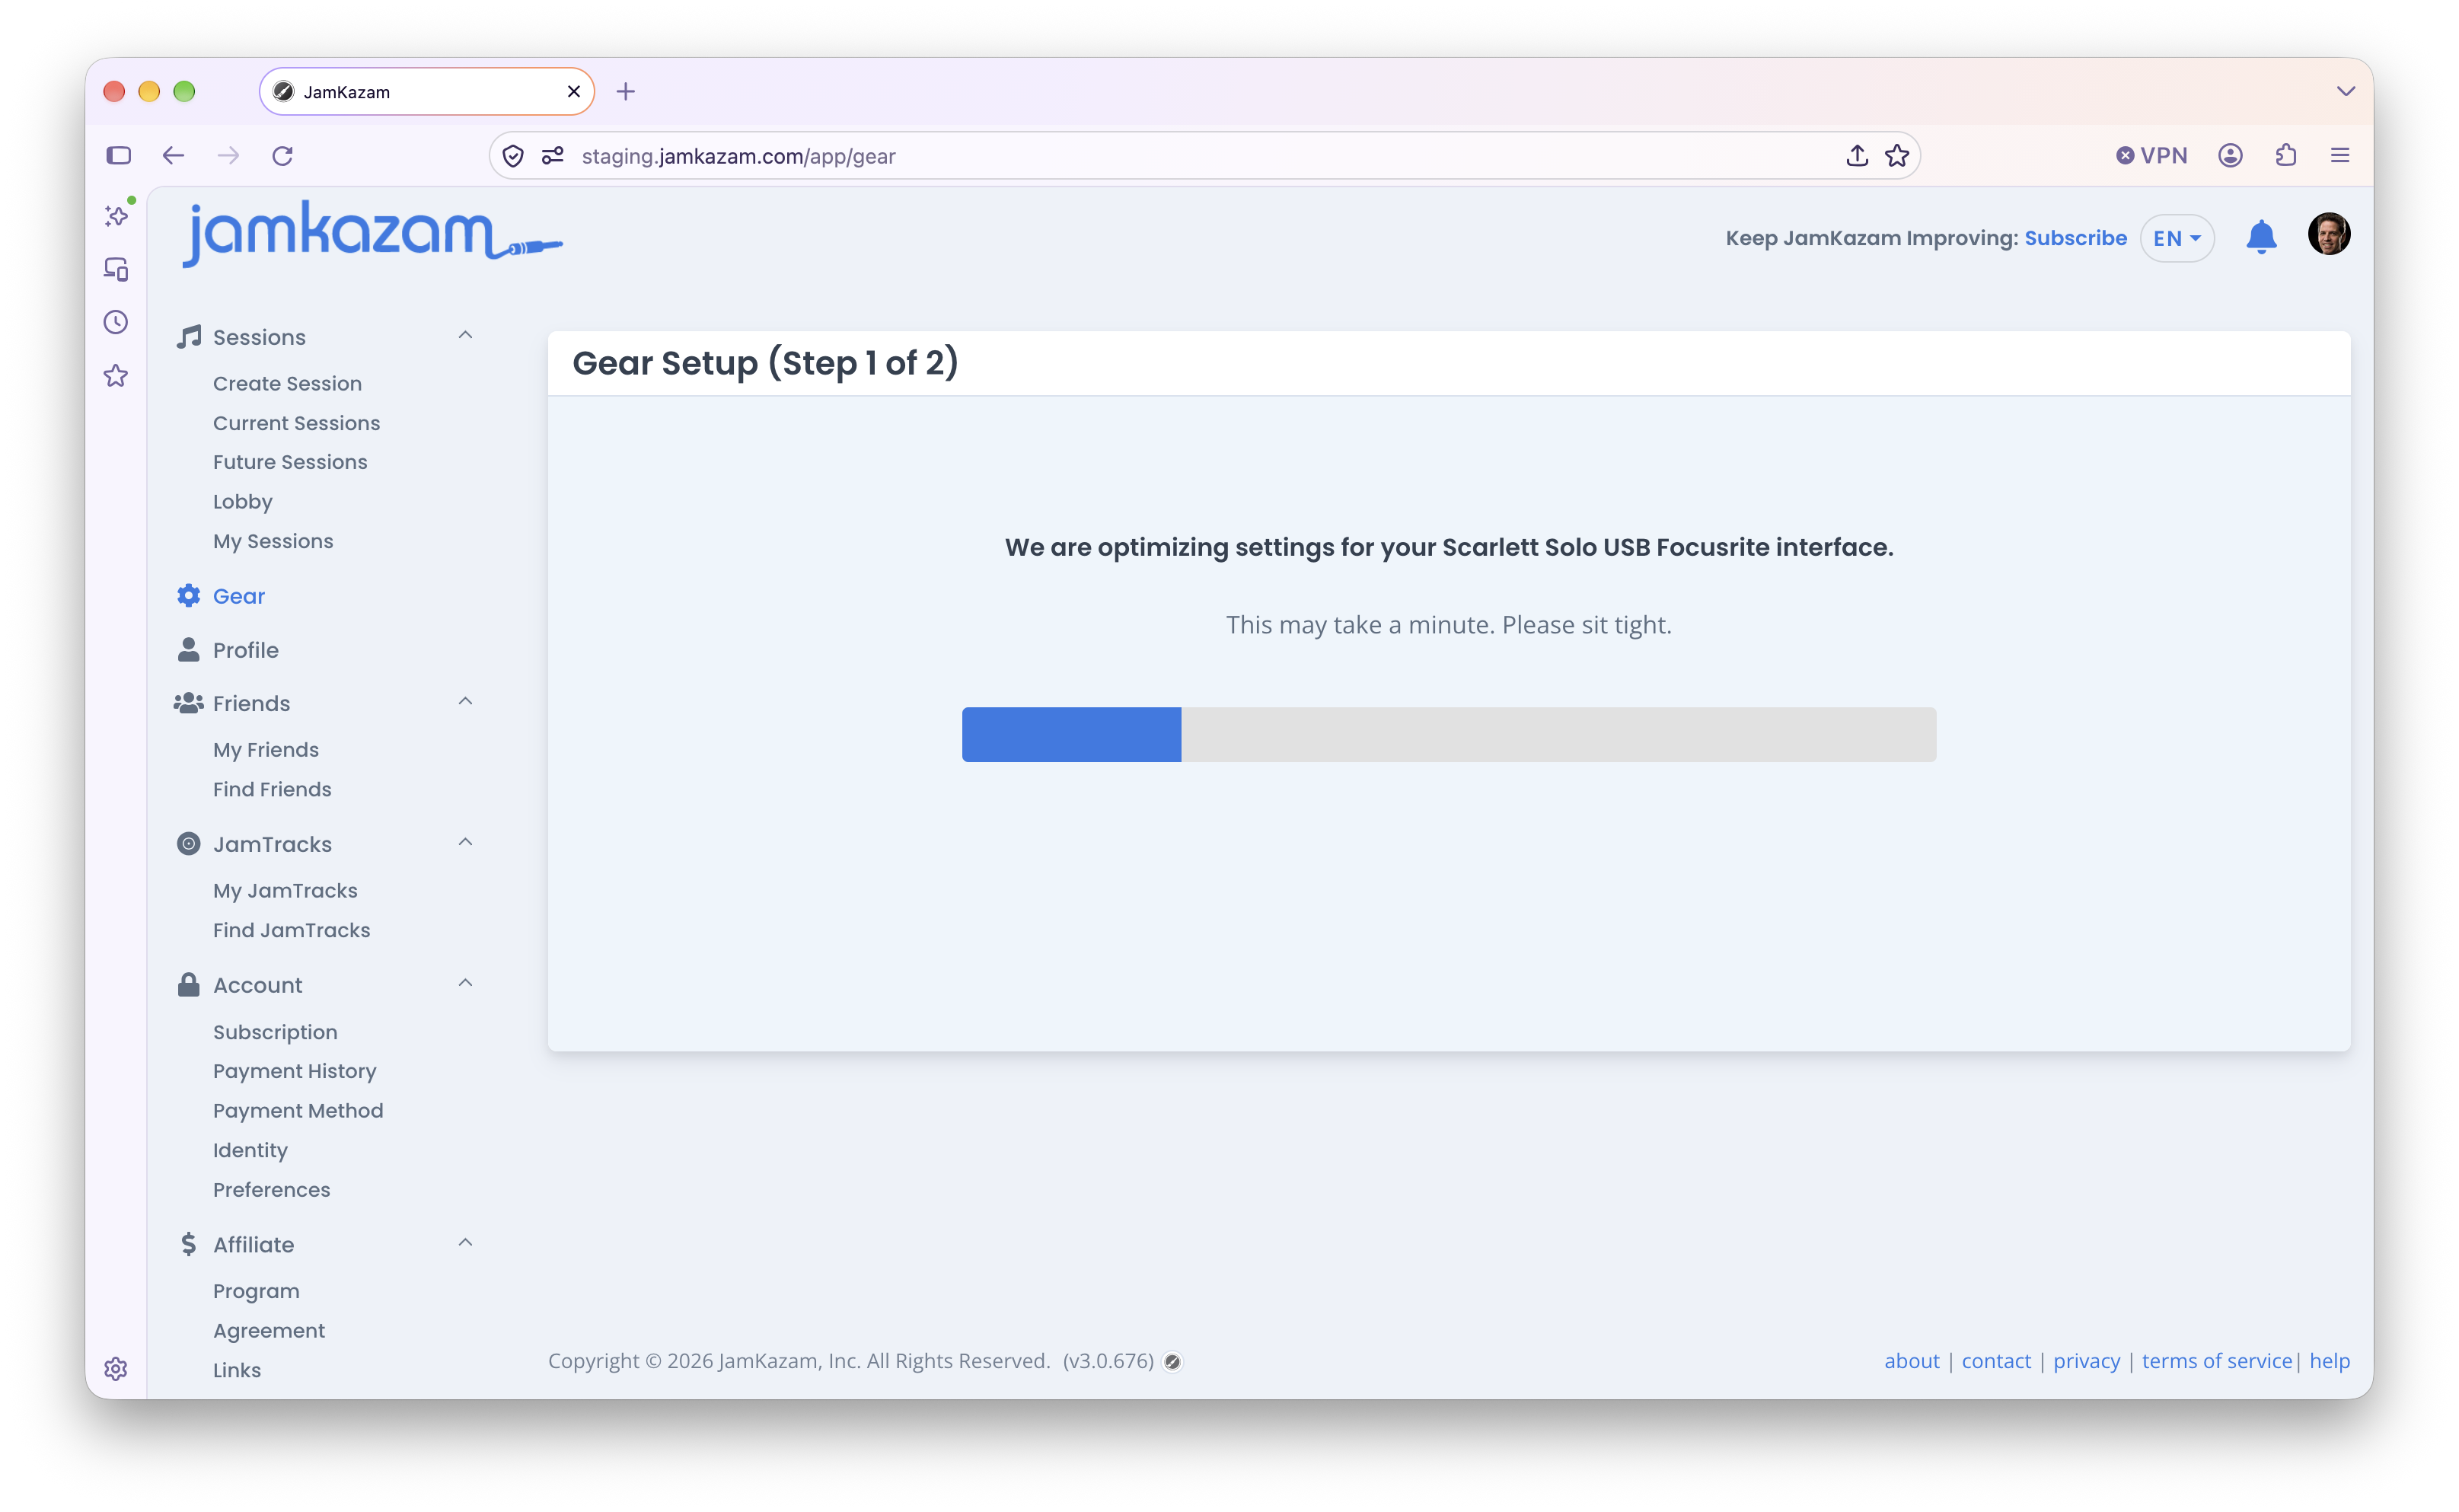
When you click the Find Optimal Settings button, JamKazam automatically tests your audio interface at different buffer size settings and checks your interface performance with each different setting to find the lowest latency setting available that delivers reliable performance. While the app is running these tests, you'll see a progress bar displayed (pictured below).
When the optimization process finishes, you will see the results displayed (pictured below).
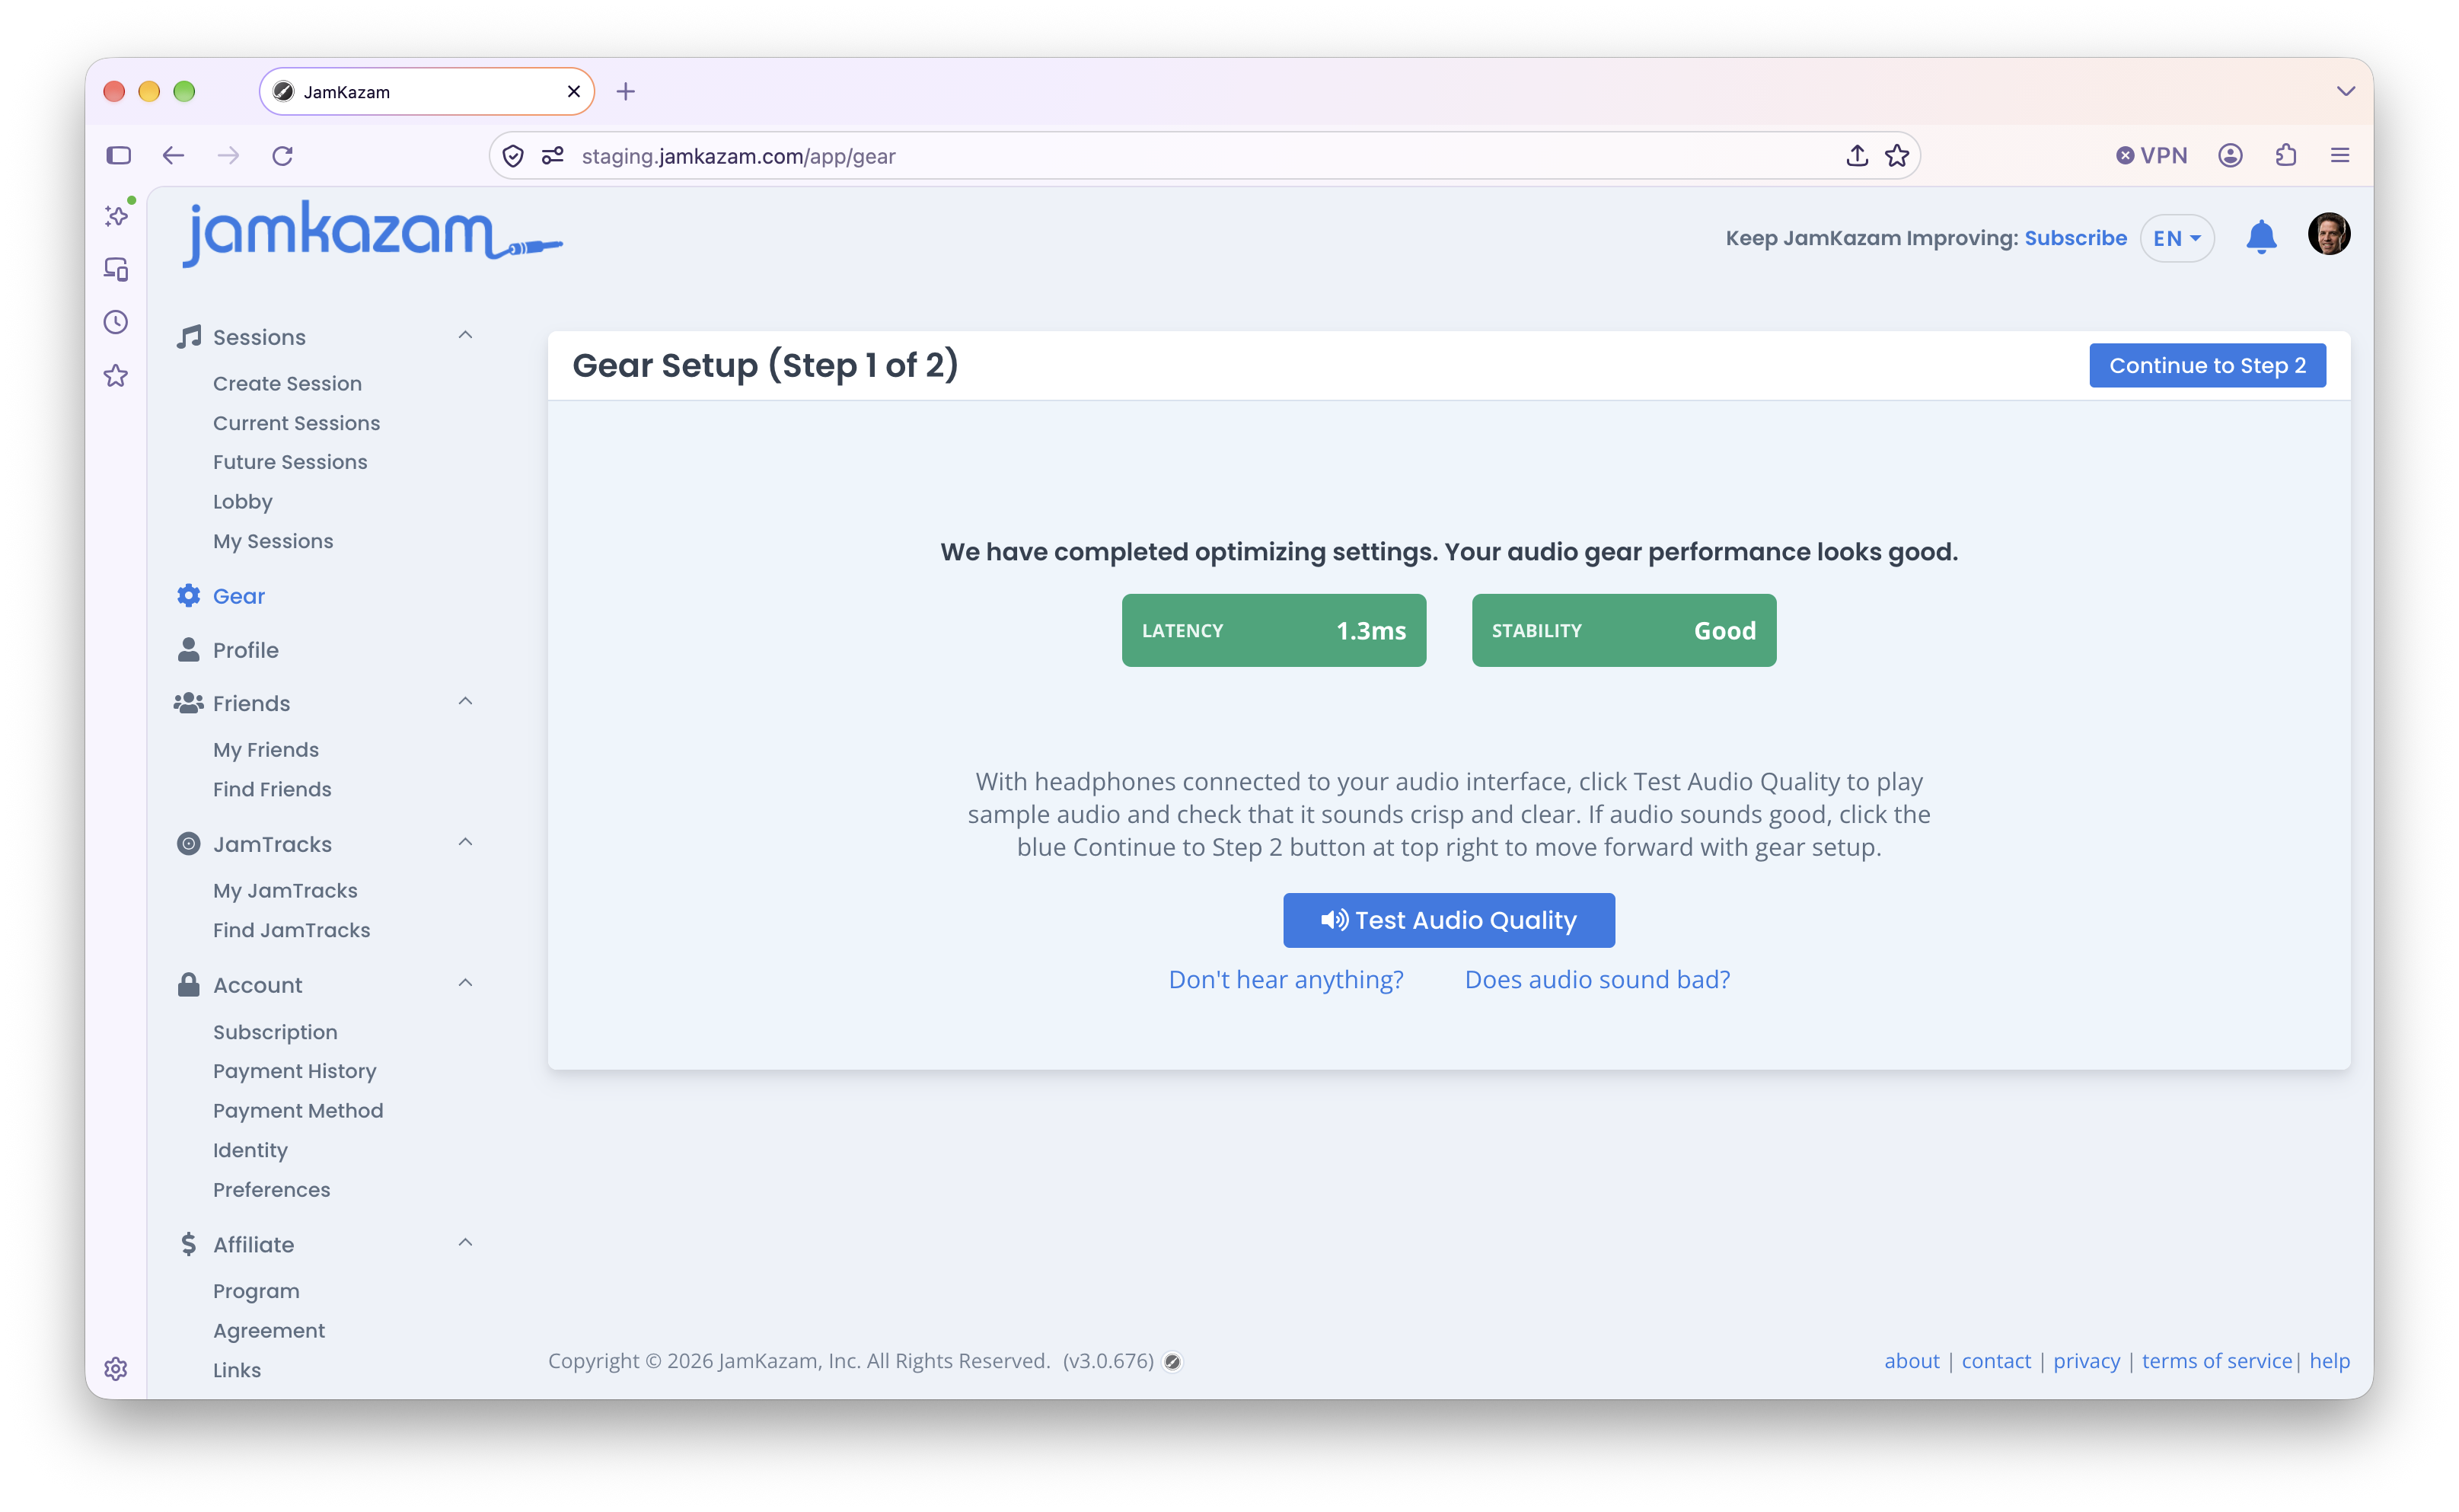
If your latency and stability scores are green, put on the headphones you have connected to your audio interface, and click the Test Audio Quality button. Listen to the looping sound effect that is playing to be sure it sounds clear and crisp. If it sounds good, click the Continue to Step 2 button at the top right of the page (pictured above).
If your latency or stability scores are red, read this help article to troubleshoot the problem. If your scores are yellow, you may continue to step 2, or you can take some time to troubleshoot to see if you can improve your scores.
When you move ahead to Step 2, we recommend you read this help article to understand how to configure the audio tracks you want to use for your instrumental and vocal performances.
Manual Interface Setup
If JamKazam is unable to control your audio interface settings, you'll need to do this manually yourself. When you click the Configure Gear, the manual Step 1 controls are displayed (pictured below).
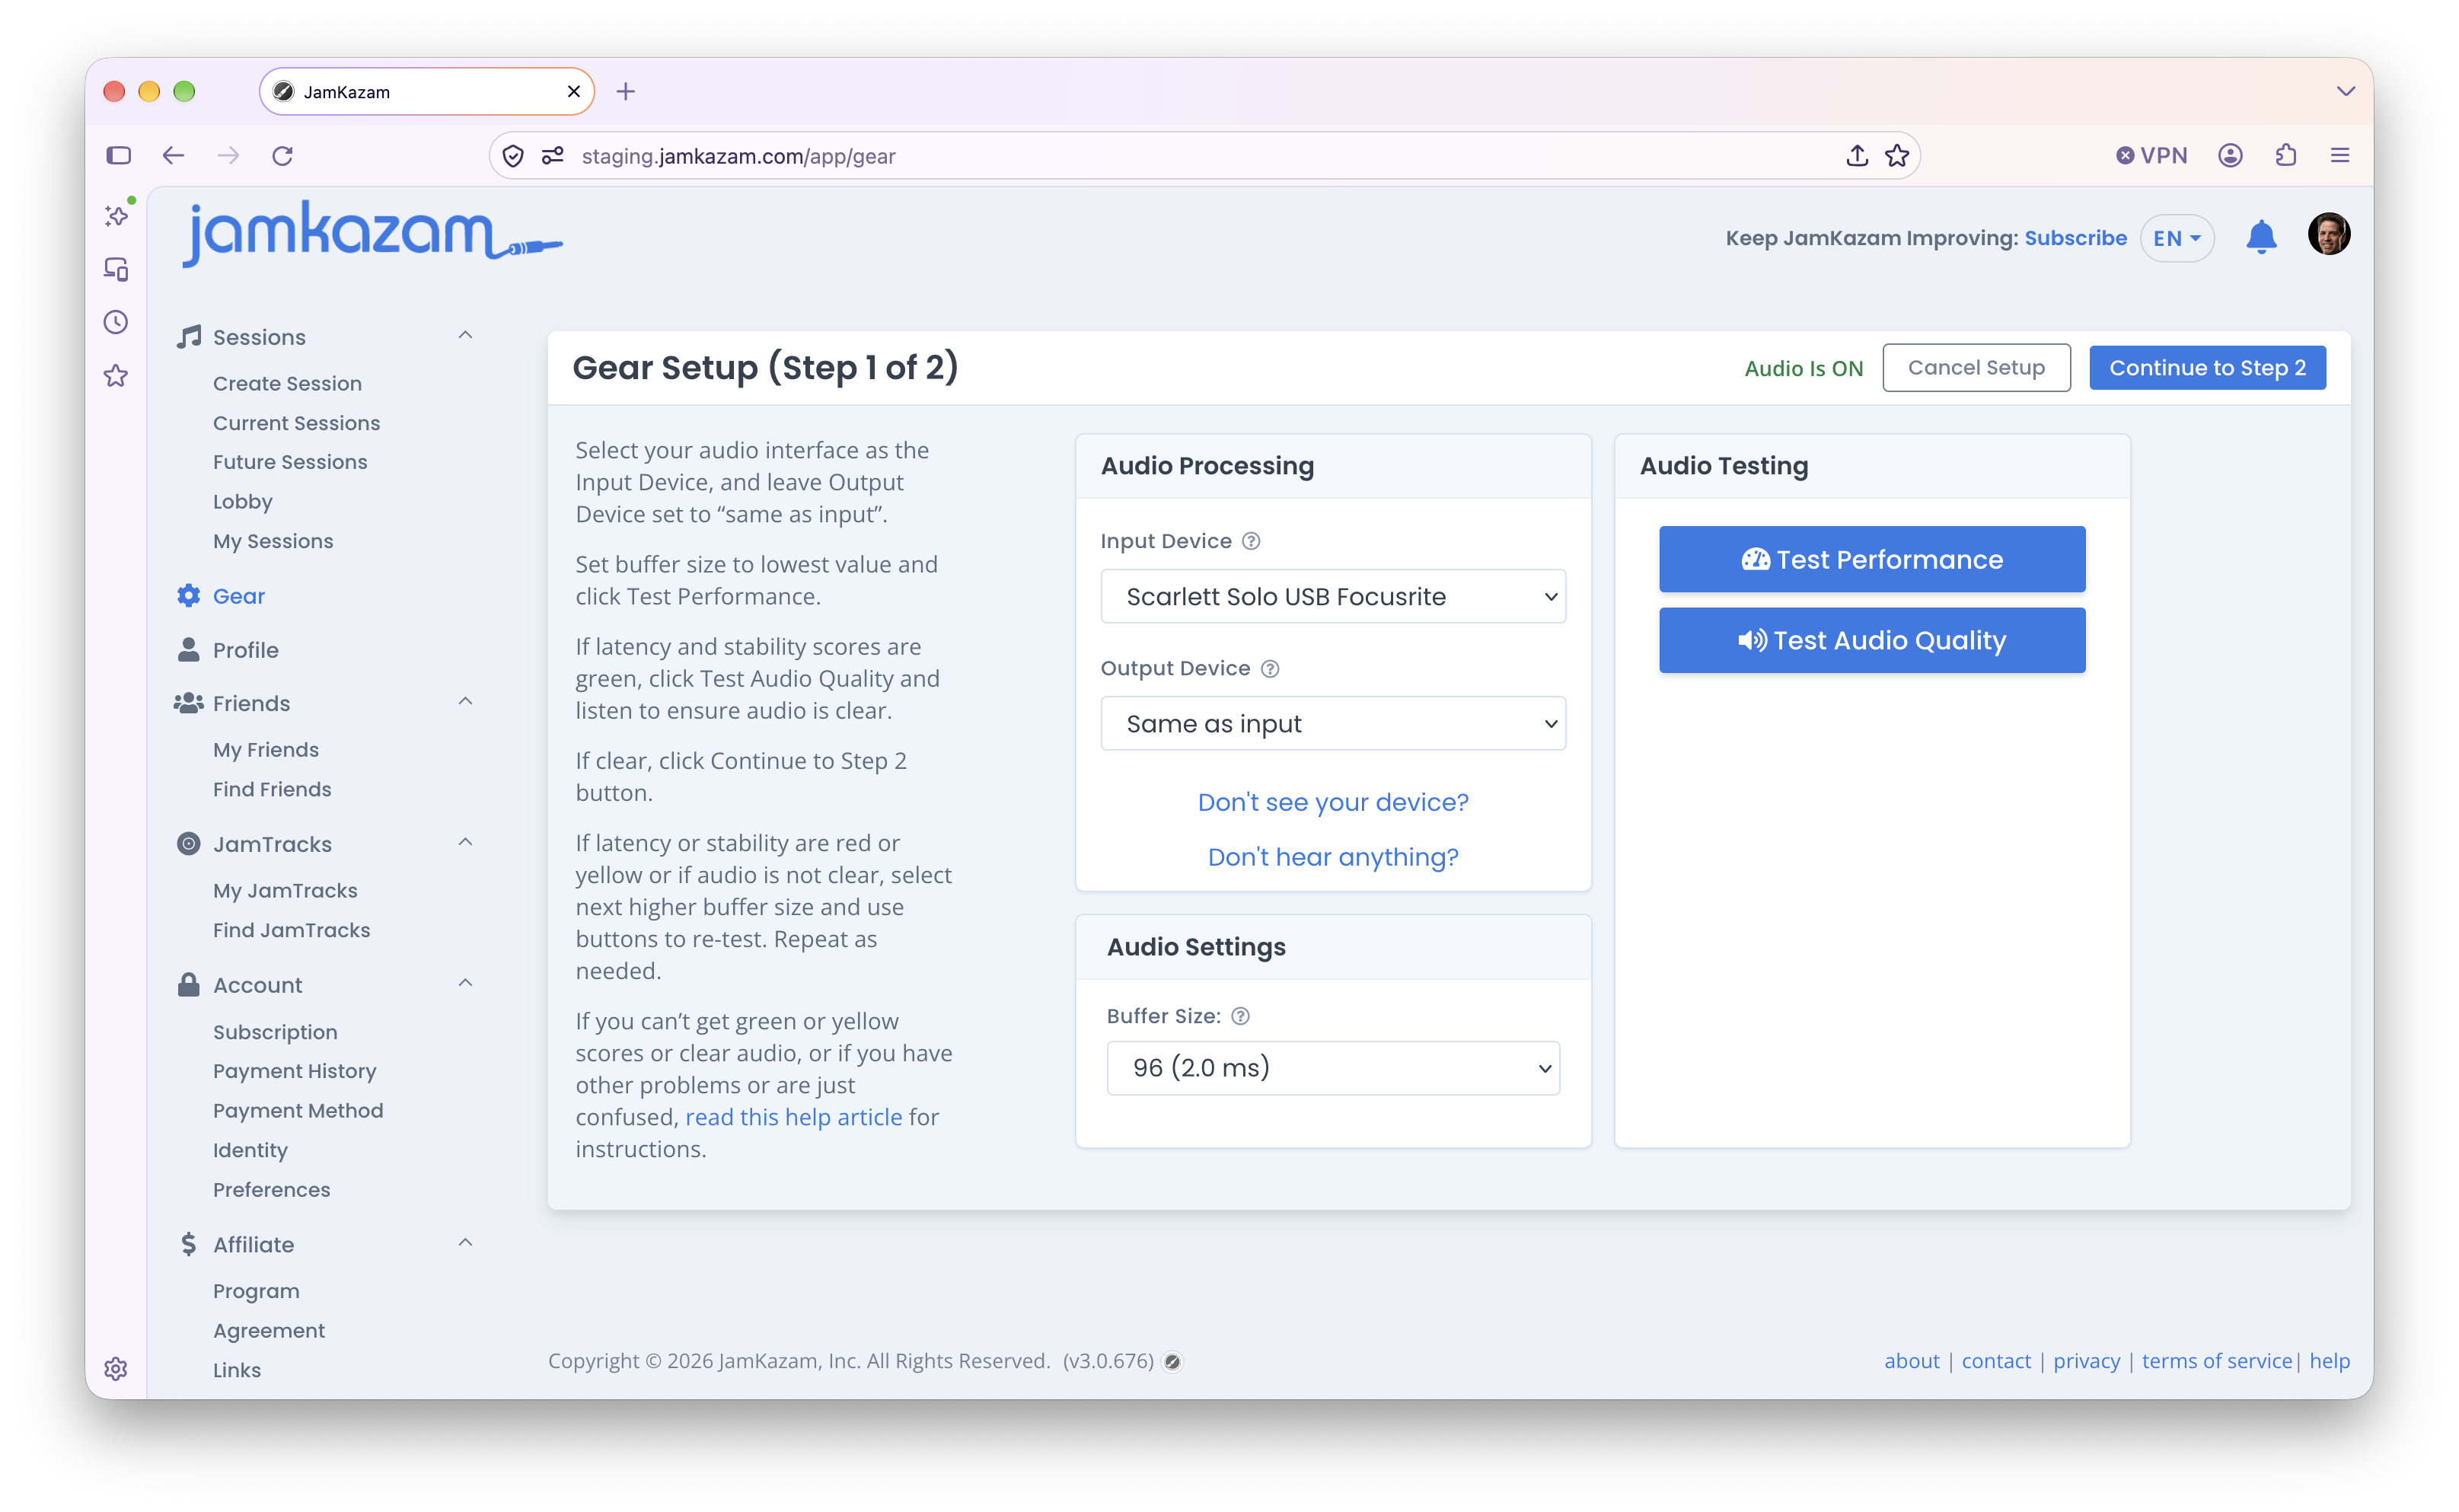
Your connected audio interface should already be selected as the Input Device, and the Output Device should be set to "Same as input". You should:
- Click on the Buffer Size list box and select the smallest buffer size in the list. This will often be 16, but this can vary from one audio interface to another.
- Click the Test Performance button. JamKazam will run a test to measure the latency with this buffer size setting, while also checking to see if your interface performance is stable and reliable at this setting. When the test finishes, your results are displayed (pictured below).
- If your test scores/results are green (good), put on the headphones you have connected to your audio interface, and click the Test Audio Quality button. Listen to the looping sound effect that is playing to be sure it sounds clear and crisp. If it sounds good, click the Continue to Step 2 button at the top right of the page.
- If your test scores/results are yellow (fair) or red (poor), we recommend you go back and start again from #1 above, this time selecting the next larger buffer size and testing in #2 and #3 until you get green results.
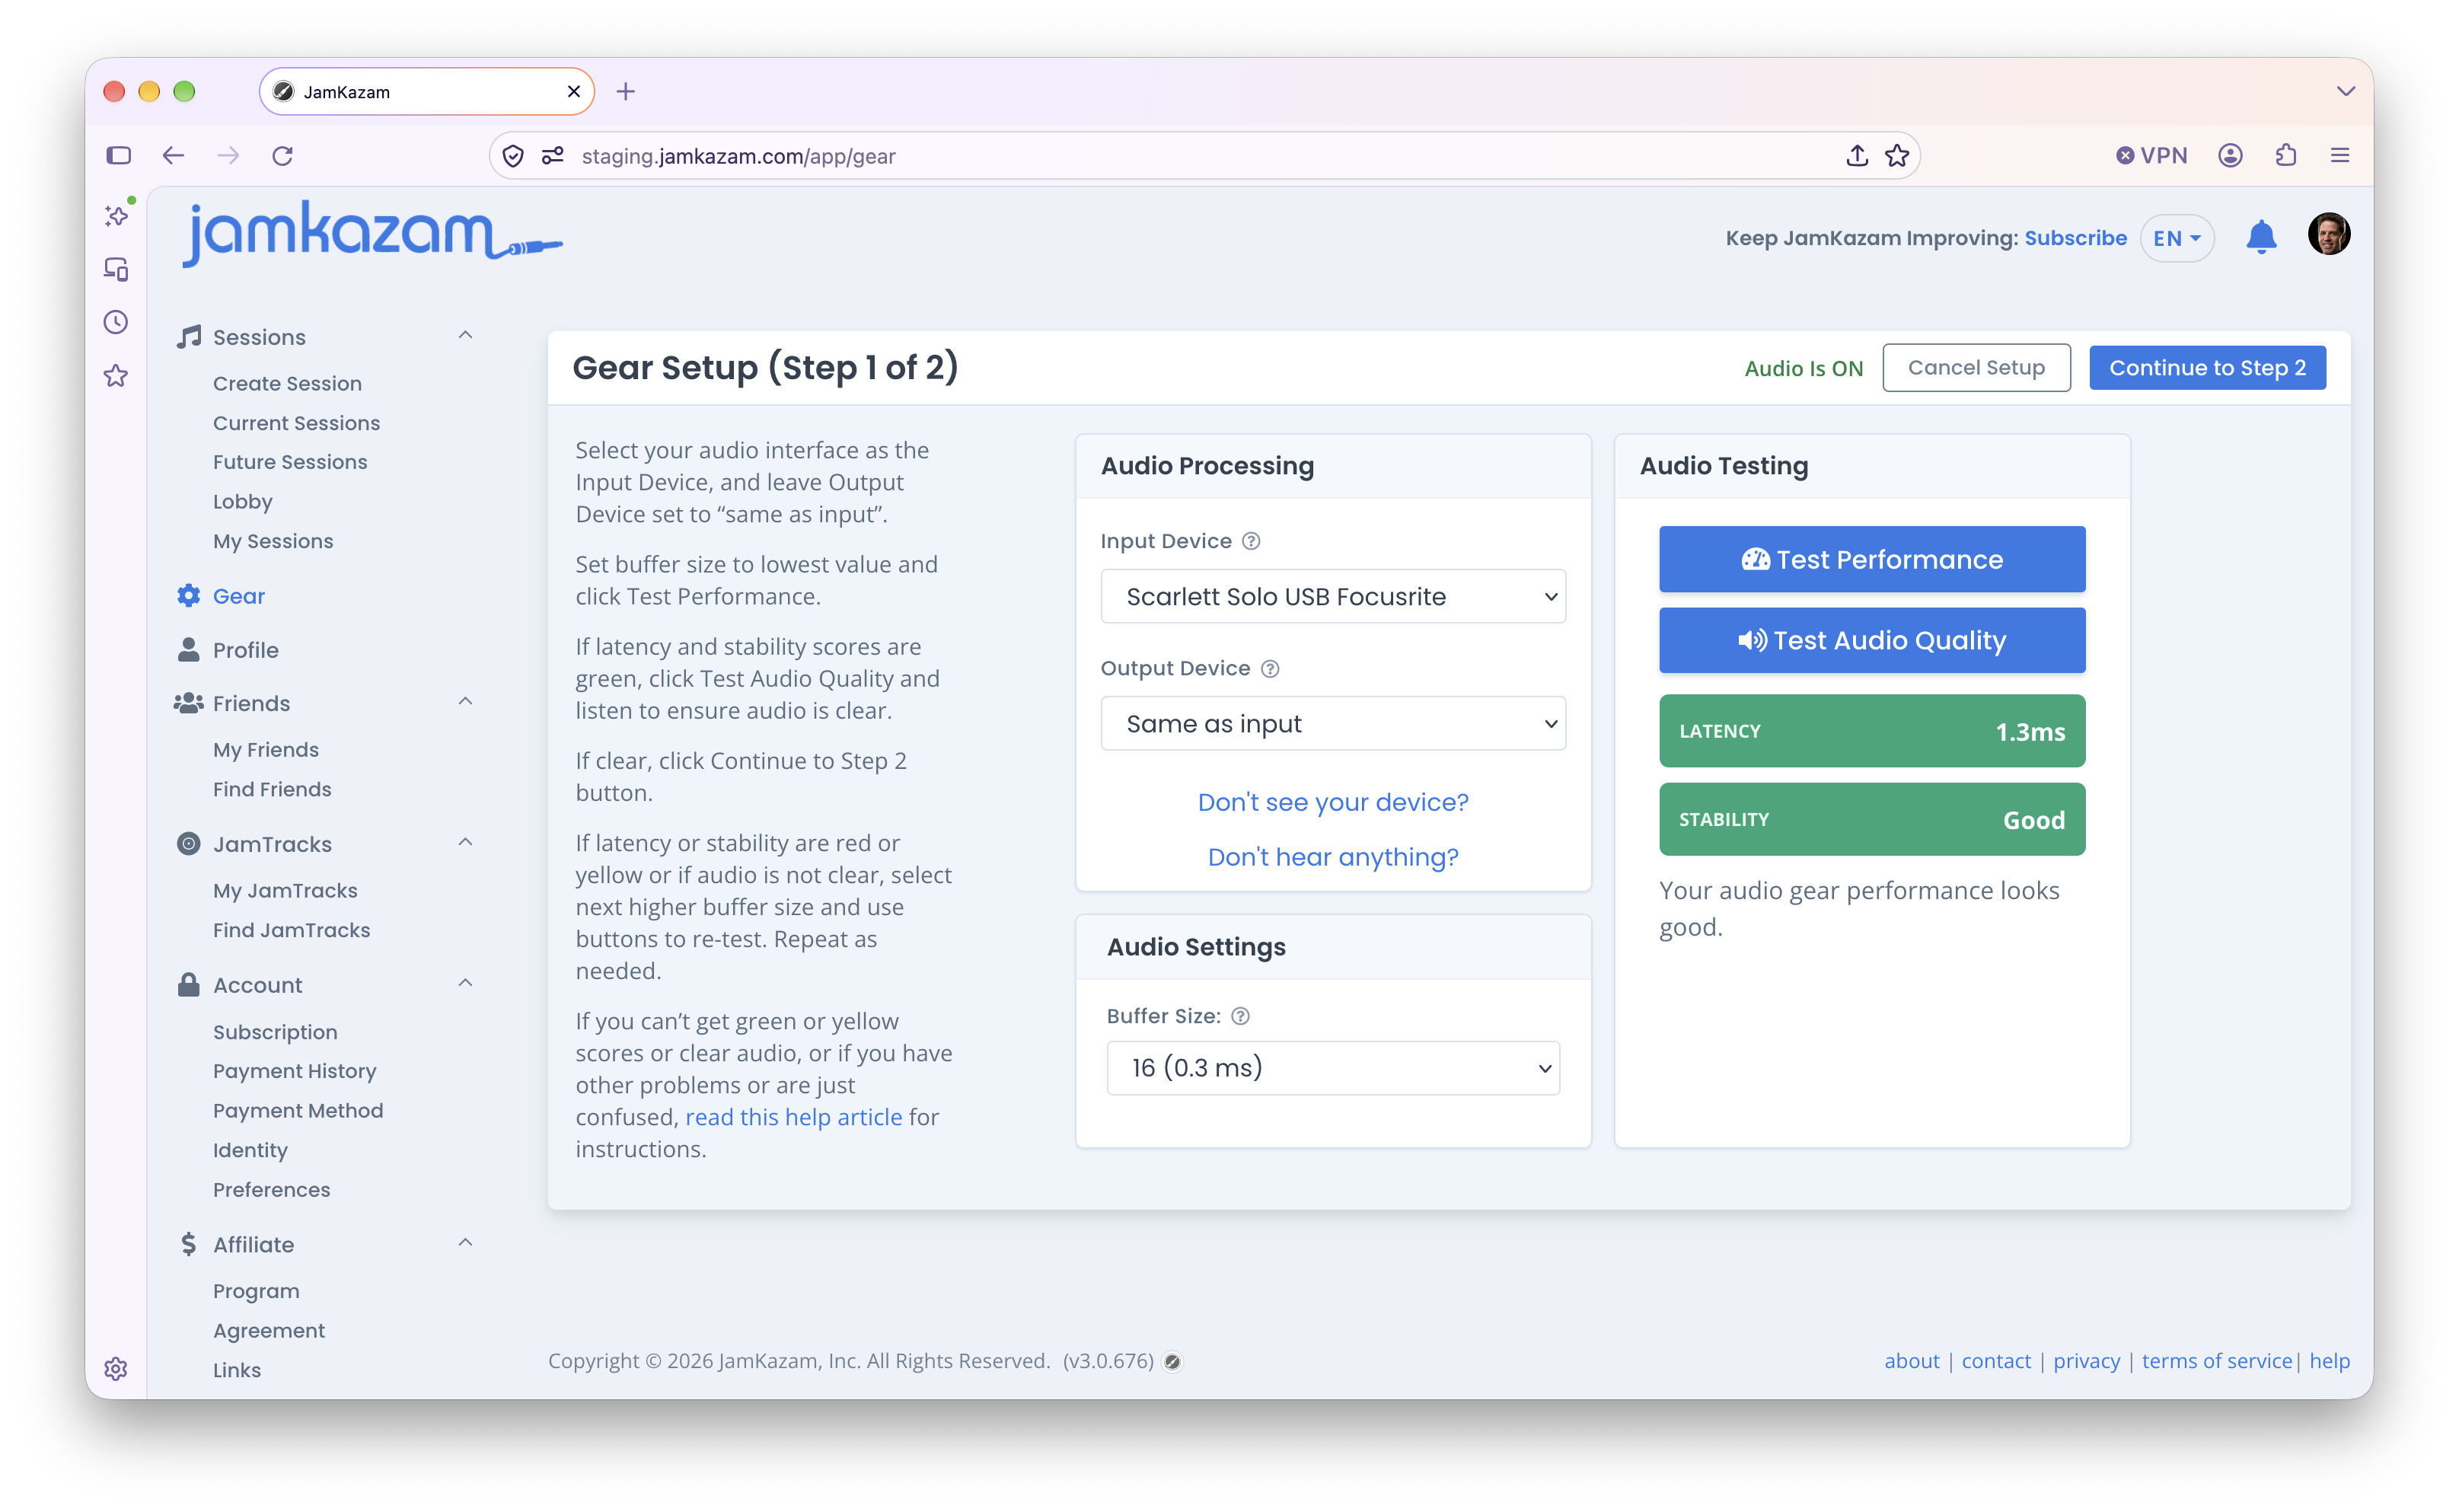
If your latency or stability scores remain red, read this help article to troubleshoot the problem. If your scores are yellow, you may continue to step 2, or you can take some time to troubleshoot to see if you can improve your scores. If you still cannot get your results in the green, or at least yellow, we recommend contacting our team at support@jamkazam.com for help.
When you move ahead to Step 2, we recommend you read this help article to understand how to configure the audio tracks you want to use for your instrumental and vocal performances.